OAuth2 for Eudoramail
Getting Started
Introduction
As the creators of a modern e-Mail product for the desktop computer, we offer some support for the Open Authorisation protocol version 2 (better known as OAuth2). While we are not entirely content with how we've had to implement it for the time being, recent events have forced our hand, and certain problems demand alpha-quality solutions rather than none at all. We say "alpha-quality" because the pro tem solution we've had to put in place is markedly user-hostile and might as well be a Platonic archetype for the concept of a spit-and-baling-twine "bodge job". To help you understand why, we'll have to explain two very difficult concepts: authentication and authorisation.
In the past, authentication—the process of proving your identity to a server—was handled in Eudora and Eudoramail using SSL/TLS encryption (this is a technology that got renamed partway through its development), alongside a system known as Basic Auth (Basic Authentication). This method requires you to send your password with each transaction (such as sending or checking email) within a secure, encrypted tunnel. The server verifies the password, then either processes your request or denies it. If someone attempts a man-in-the-middle attack, all they see is the encrypted data passing through.
However, Basic Auth doesn’t address authorization—verifying whether you're permitted to perform certain actions. The assumption is that if you have the password, you are automatically authorized to perform any action. While this may be acceptable for a small, dedicated server, it becomes problematic for large federated (single sign-on) systems like Gmail or Microsoft, which handle billions of users and services beyond just email.
For example, consider an email client that only needs permission to send and receive messages but, using Basic Auth, has access to additional services like cloud storage or calendars. If this client were malicious, it could abuse that access. Or imagine a phishing website that tricks users into entering their passwords (for a federated service, naturally) under the guise of sports betting. With Basic Auth, it would have full access to users' accounts, regardless of encryption.
To solve this, modern systems rely on a trusted directory server that manages passwords and controls what services an application can access. The email client never sends the password directly to the service it's trying to use. Instead, the directory "hashes" the password with other data (like the requested permissions and user credentials) to generate a token that can be passed to the service. This token acts as proof of authorization, making the password itself irrelevant in regular communications between the client and the server.
Unfortunately, Eudora was discontinued before this system became widespread, and major email providers now require OAuth2 starting September 2024. OAuth2 is complex, and writing code to implement it is a considerable effort. Fortunately, there is an existing solution: a local proxy. In Eudoramail 8, we’ve integrated this proxy, which effectively enables OAuth2 support for Gmail and Microsoft services.
Here’s how it works: when you want to authorise Eudoramail to send or receive emails, the proxy opens a Chrome window where you can complete the authorisation process directly with Google or Microsoft. You’ll receive a long alphanumeric code that you’ll need to copy and paste. The proxy acts as the intermediary between Eudoramail and the email service, handling the authentication. Neither Eudoramail nor the proxy ever stores or sees your password.
Microsoft Customers
NOTE: This section requires Microsoft Azure. The confusingly-named "free" access to Azure is nothing more than a 30-day free trial; although "pay-as-you-go" access is not technically free, it is free in practice, because app registration is zero-rated.
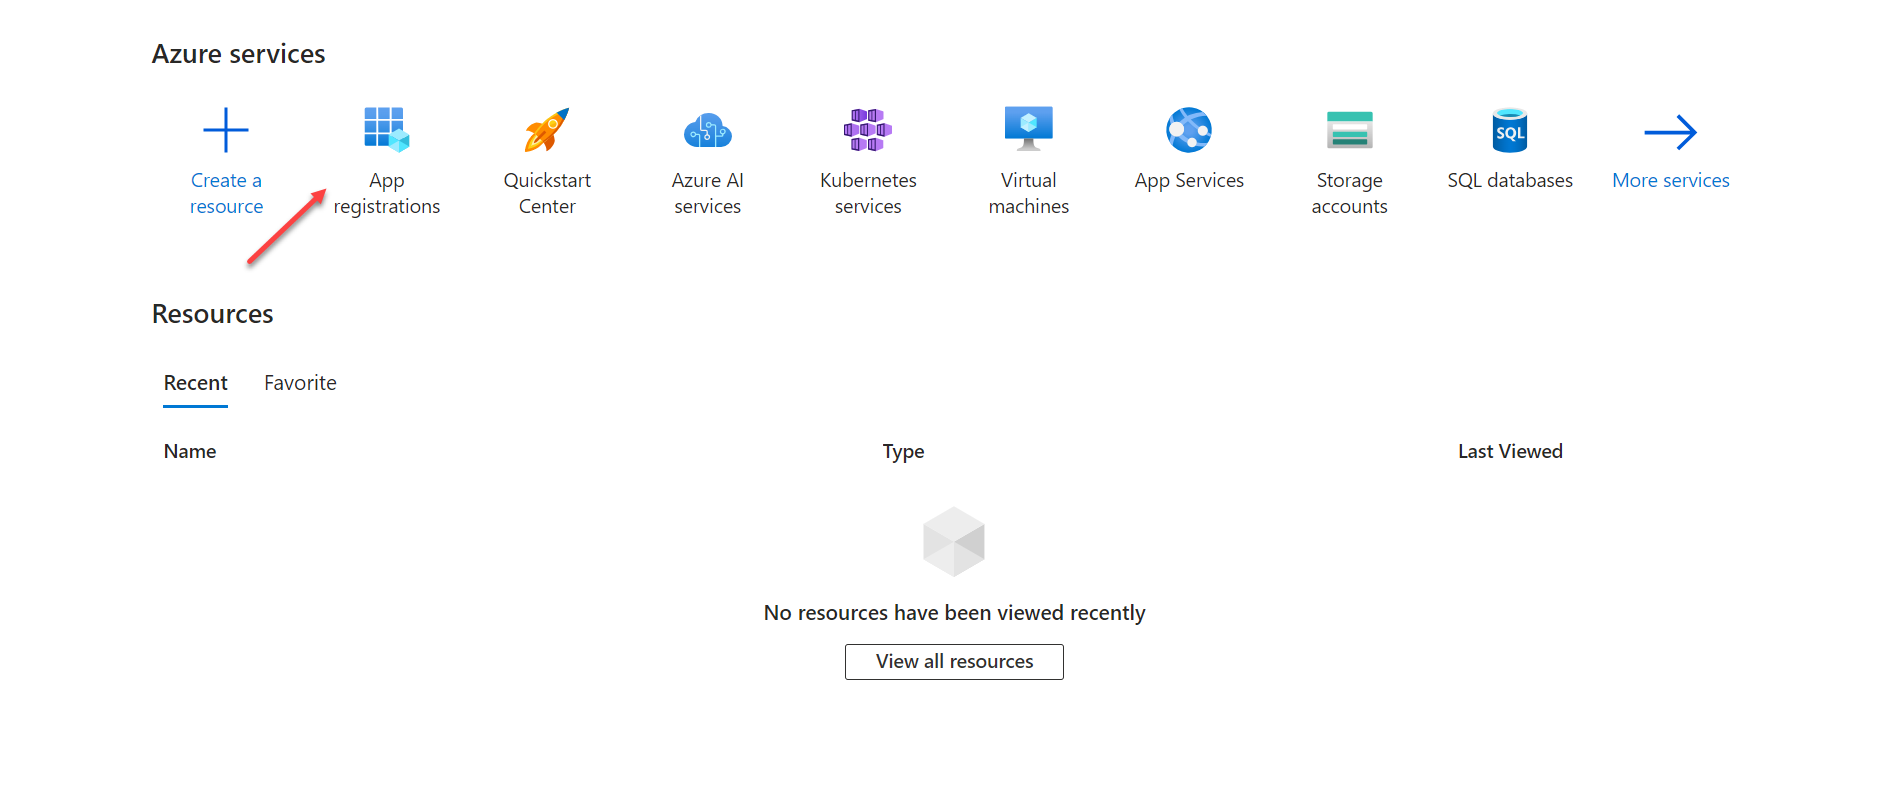
- Sign in to the Azure portal and access the Home screen.
- Click App registrations.
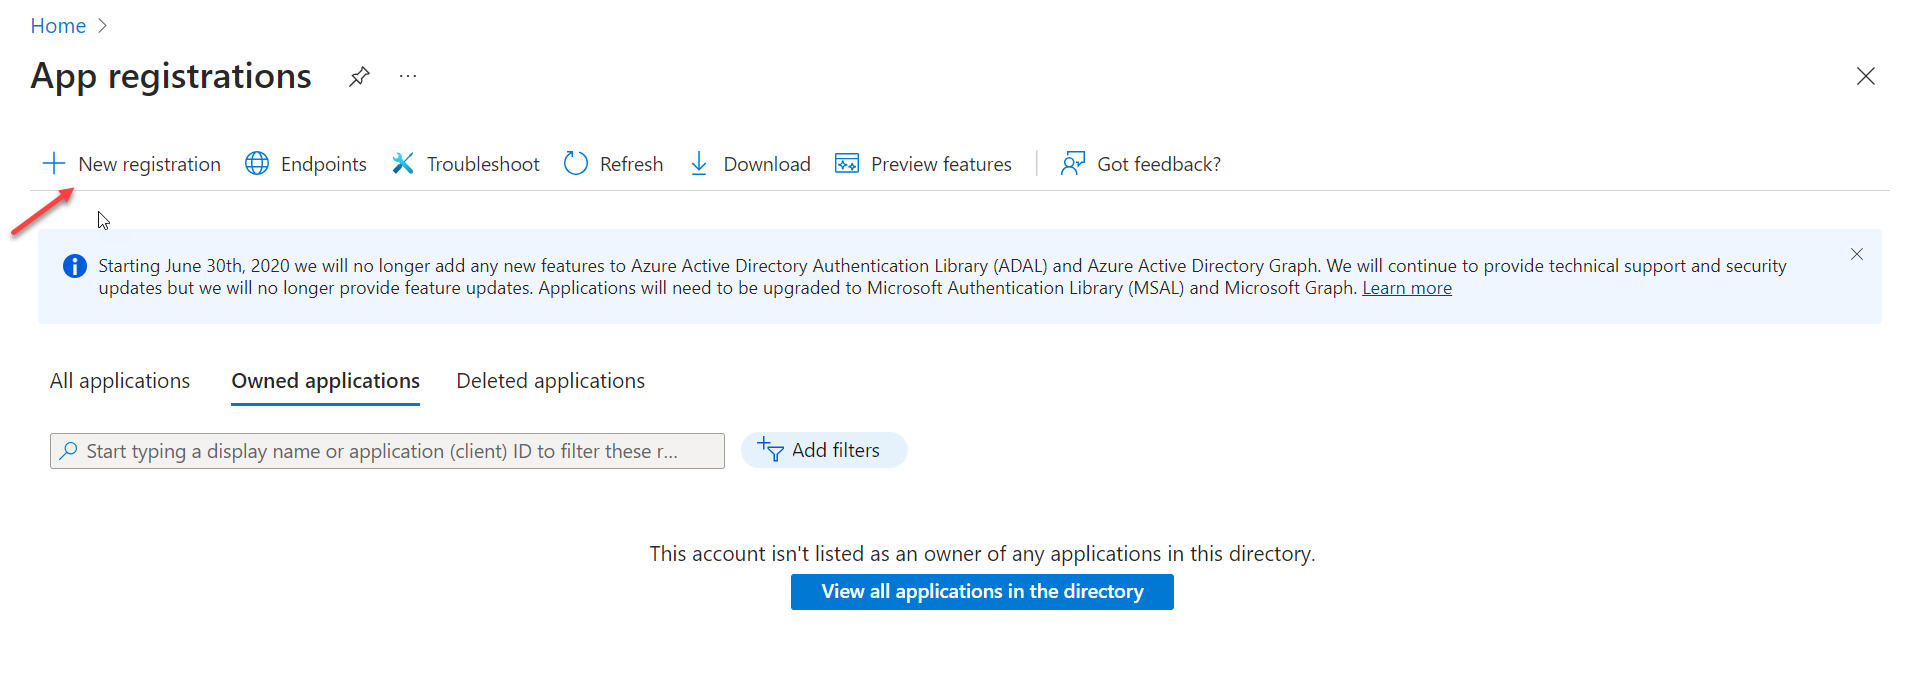
- To register the Eudoramail application, click the + symbol next to New Registration on the App registrations screen.
- On the Register an application screen, in the Name textbox, enter the name
Eudoramail or some other memorable value.
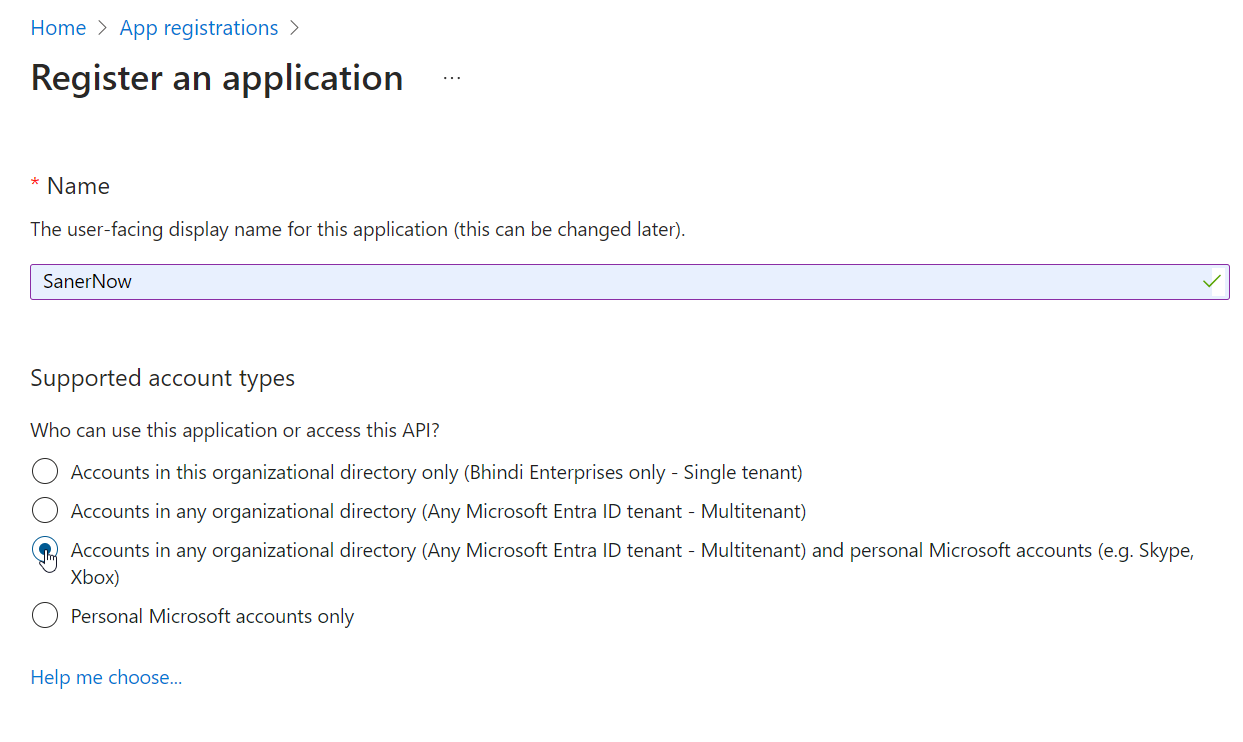
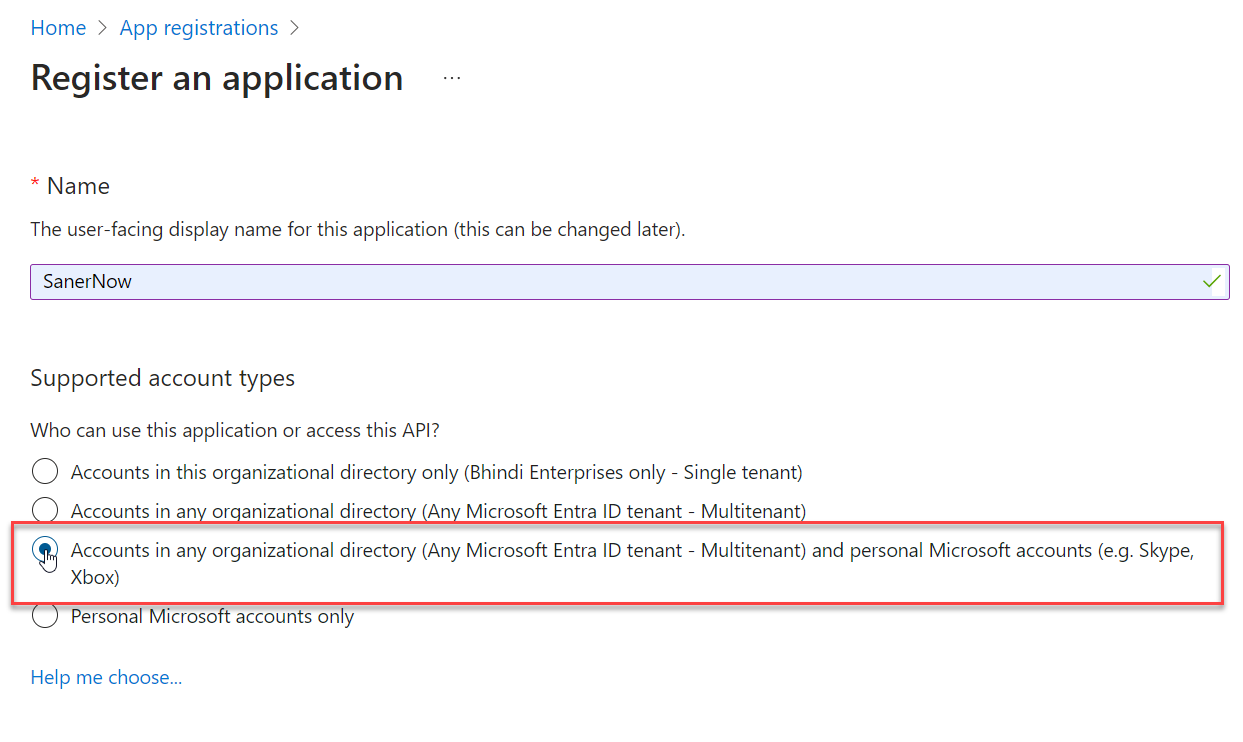
- Under Supported account types, select the option labelled Accounts in any organizational directory (Any Microsoft Entra ID tenant – Multitenant) and personal Microsoft accounts (e.g. Skype, Xbox).
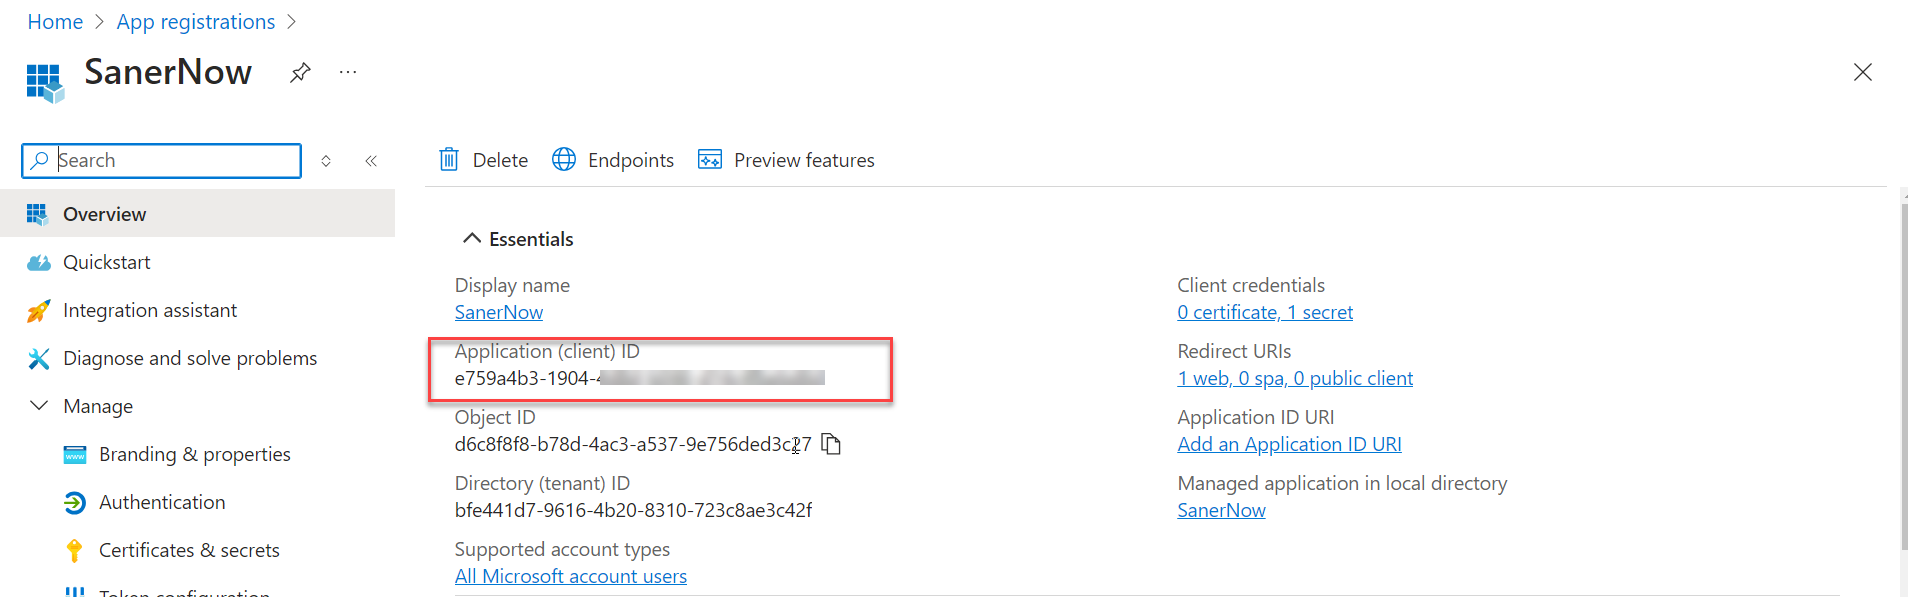
- Click the Register button to save the changes. You will be redirected to a screen containing the Application (client) ID. IMPORTANT: Note the Client ID as it will be needed while setting up OAuth.
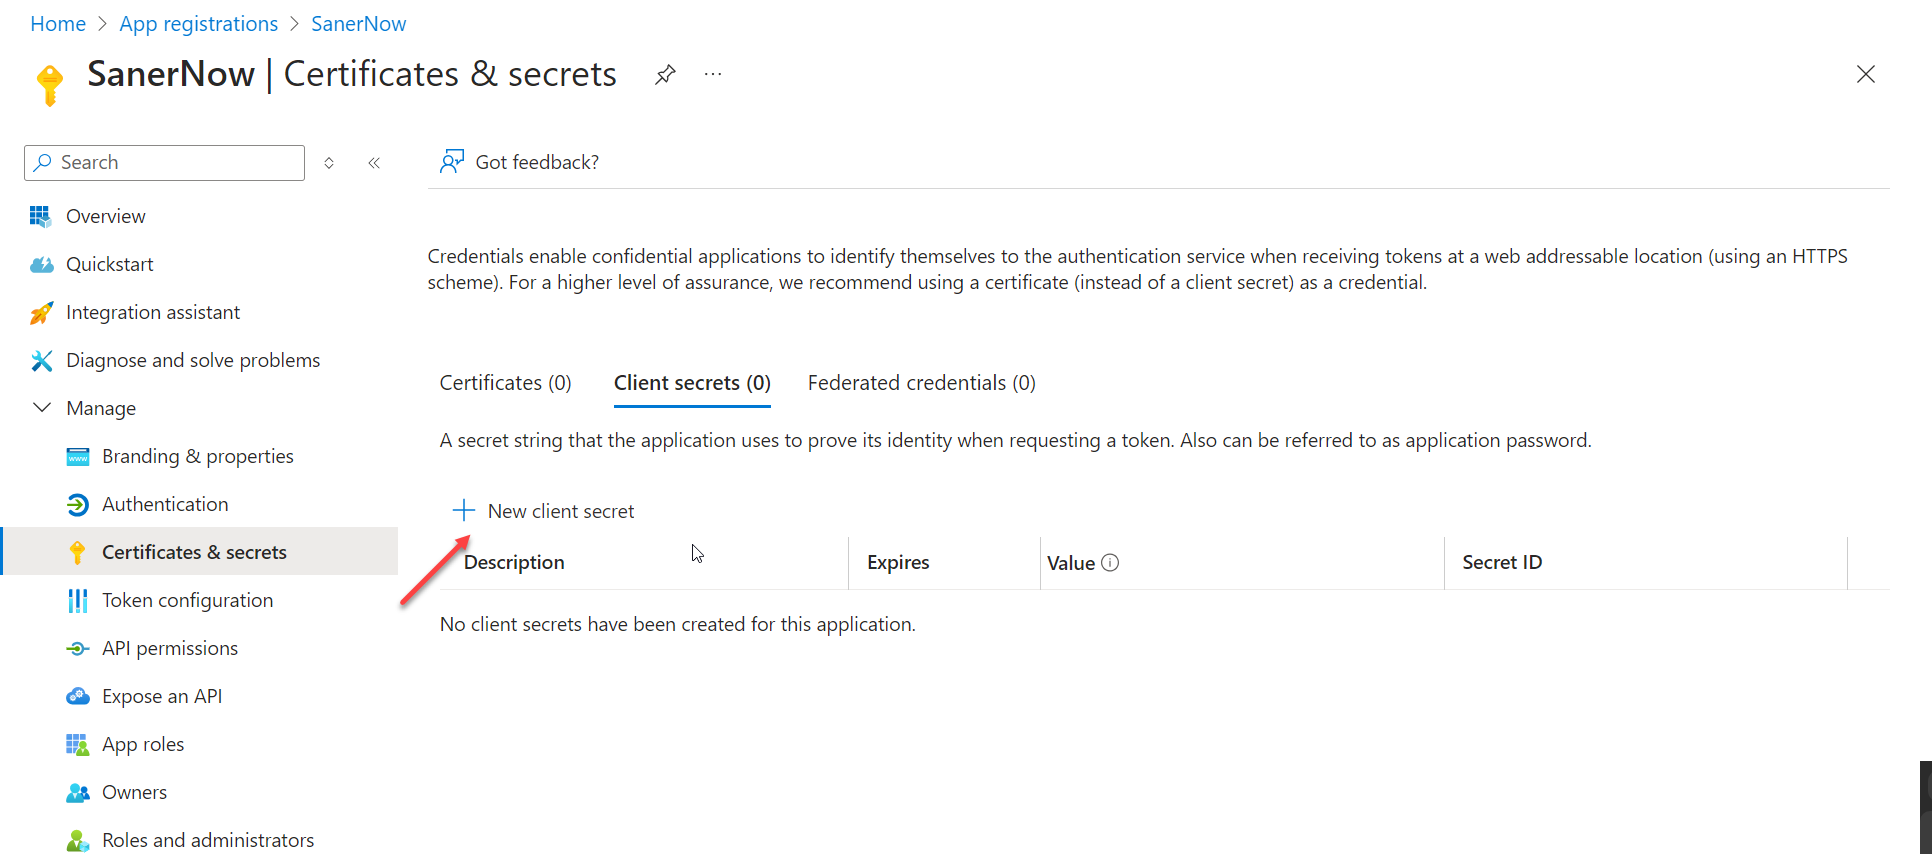
- Navigate to Manage > Certificates & secrets. Click on the + symbol located next to New client secret.
- In the Add a client secret window, enter a suitable description (for example, Eudoramail proxy client secret). Then, specify the client secret's expiration date according to taste (we, like Microsoft, recommend six months).
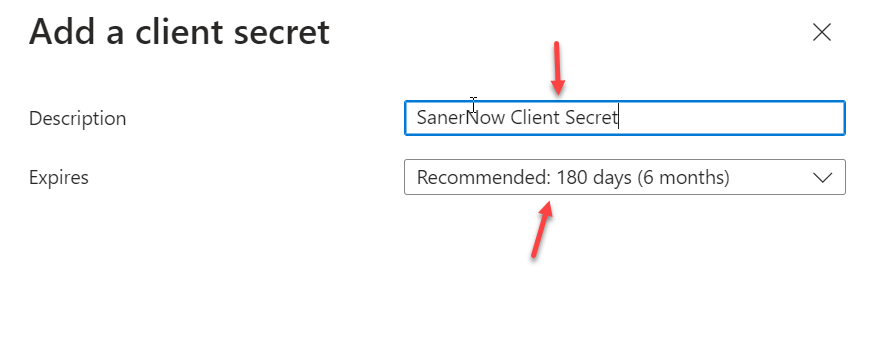
- Click the Add button to save the changes.
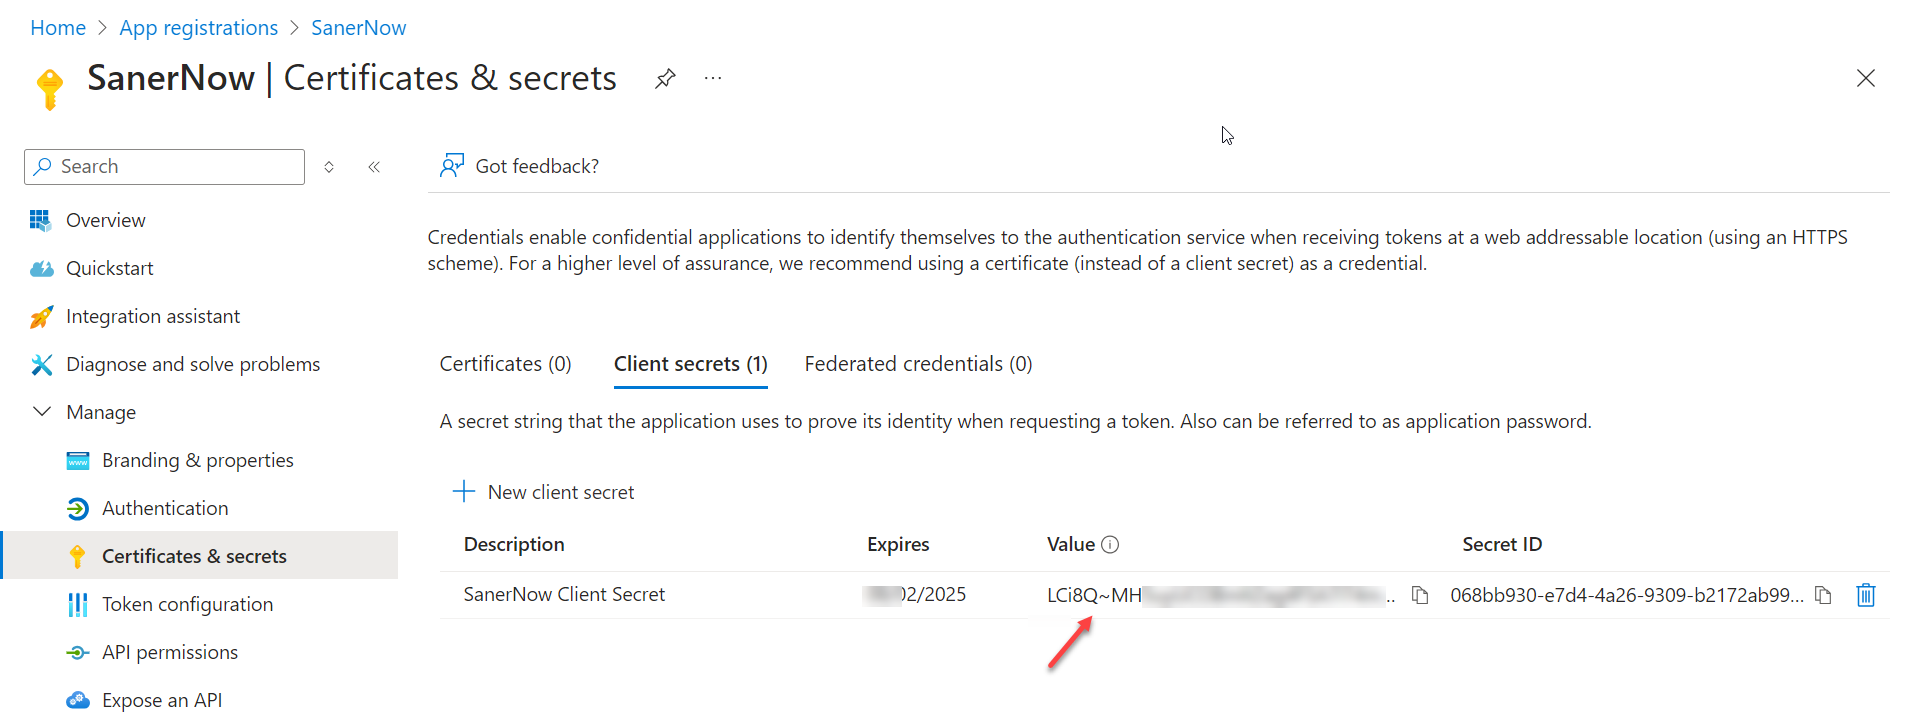
- Note the value associated with the Secret Value. NOTE: You will need this value later.
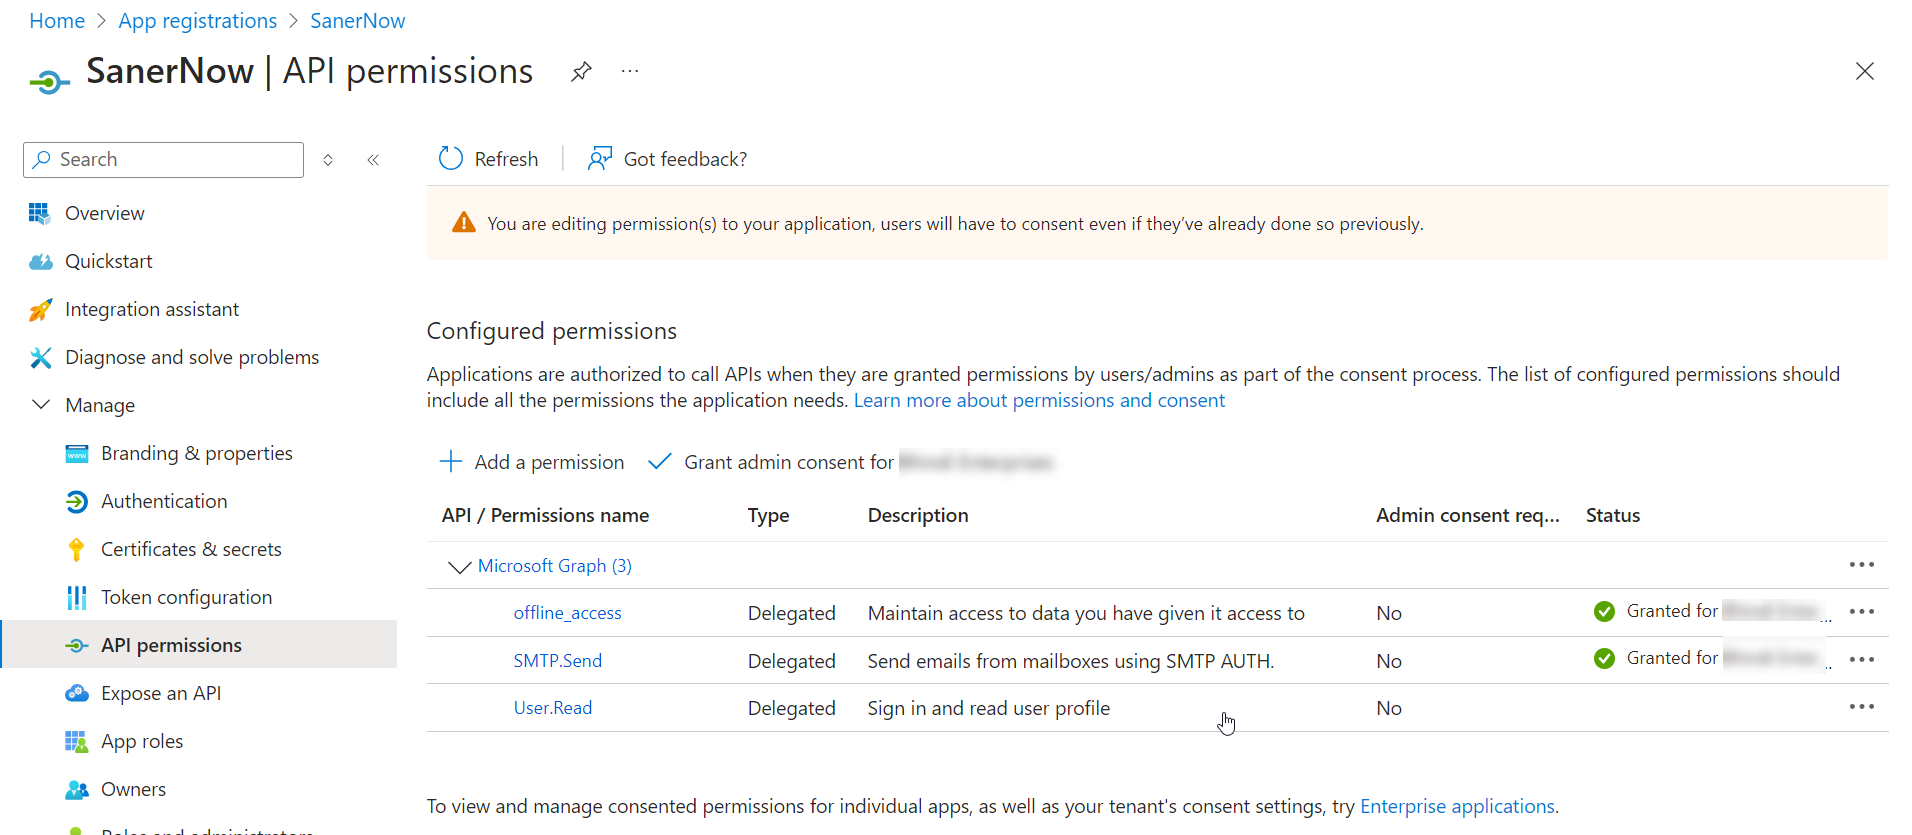
- Navigate to Manage > API permissions. Click on the + symbol next to Add a permission.
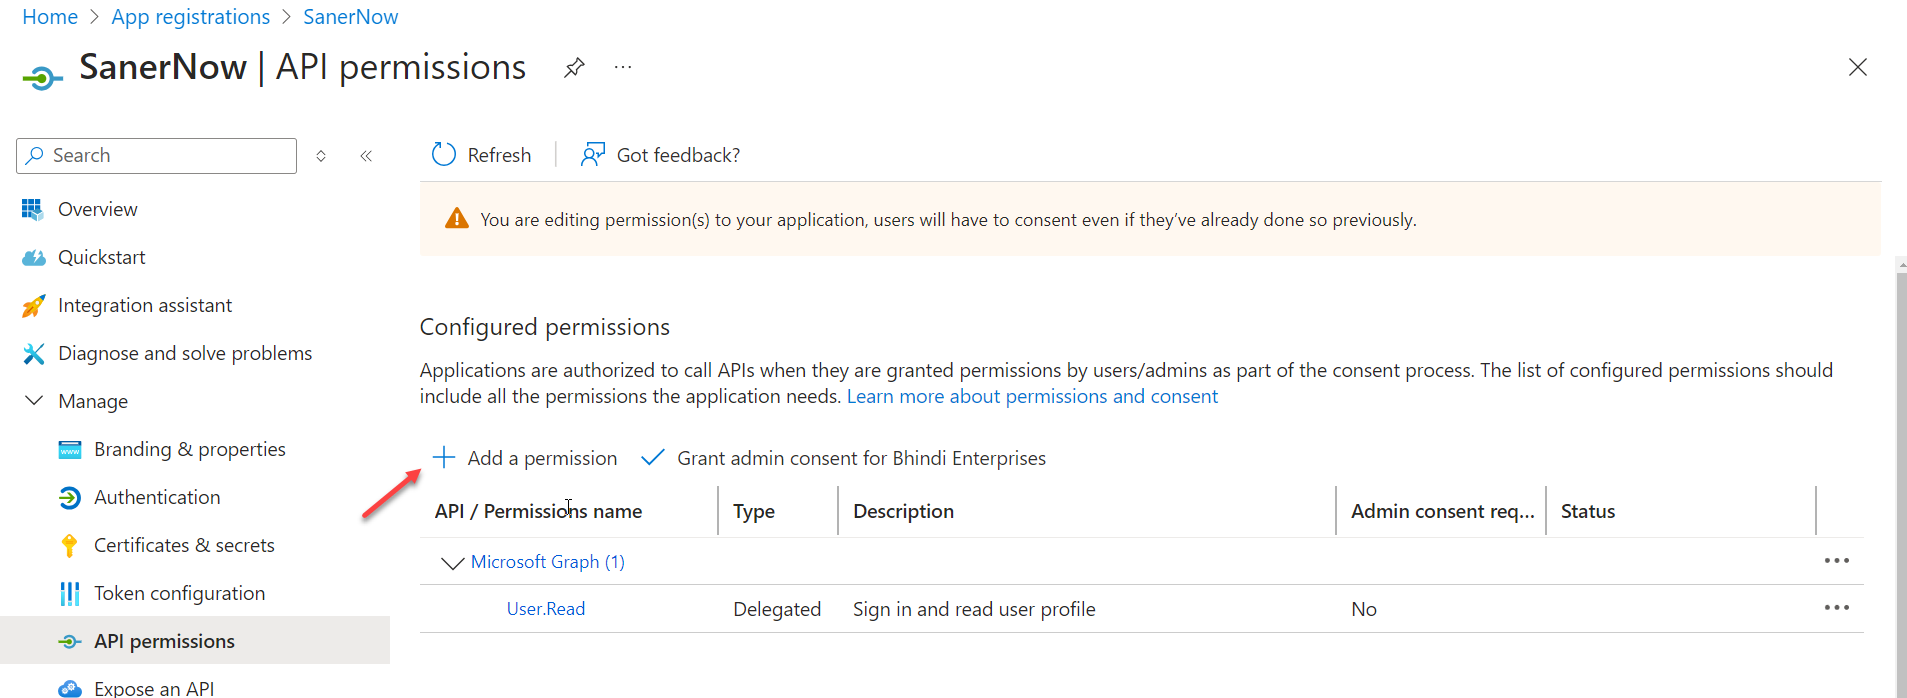
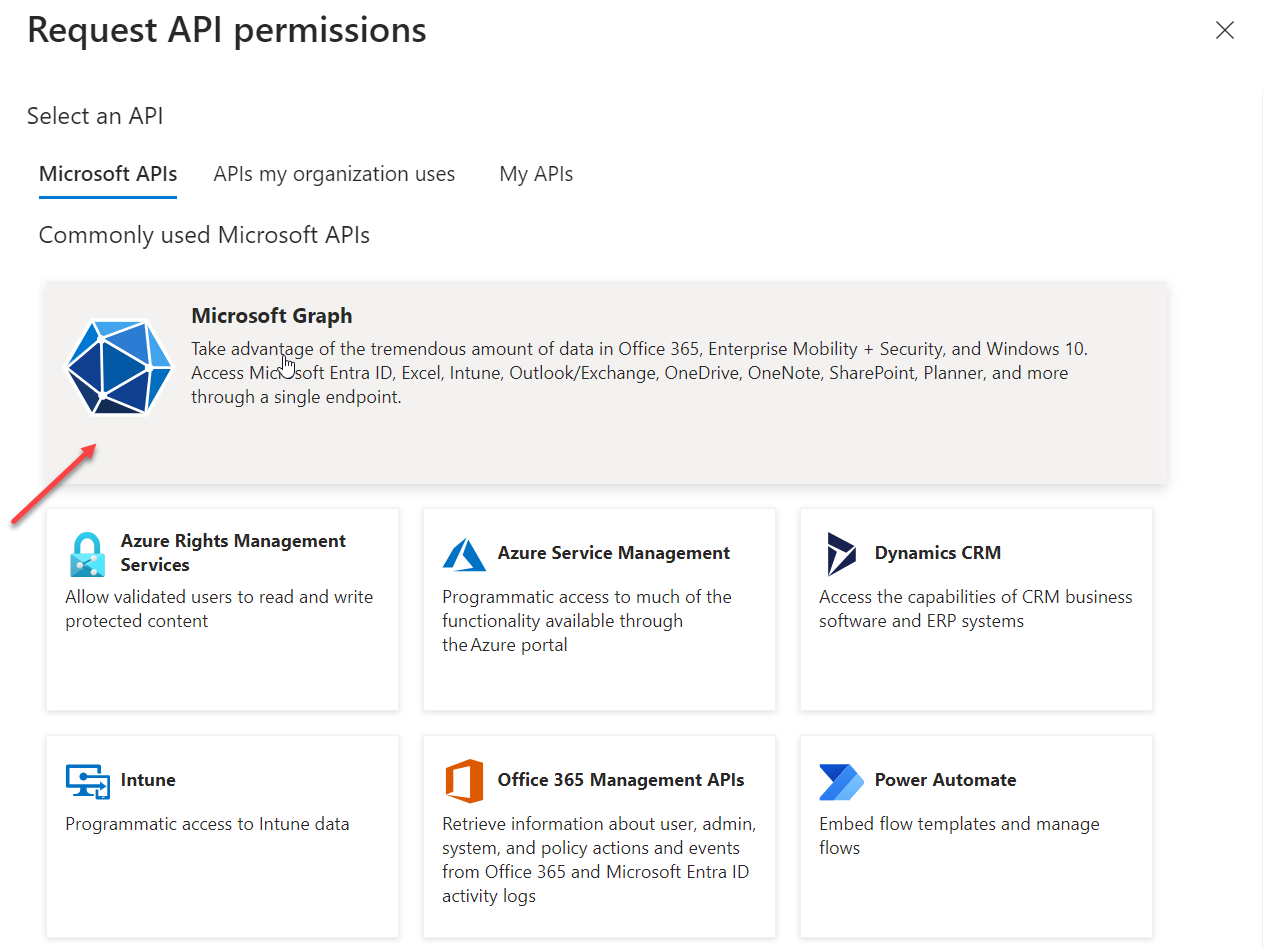
- On the Request API permissions screen, select the Microsoft Graph API.
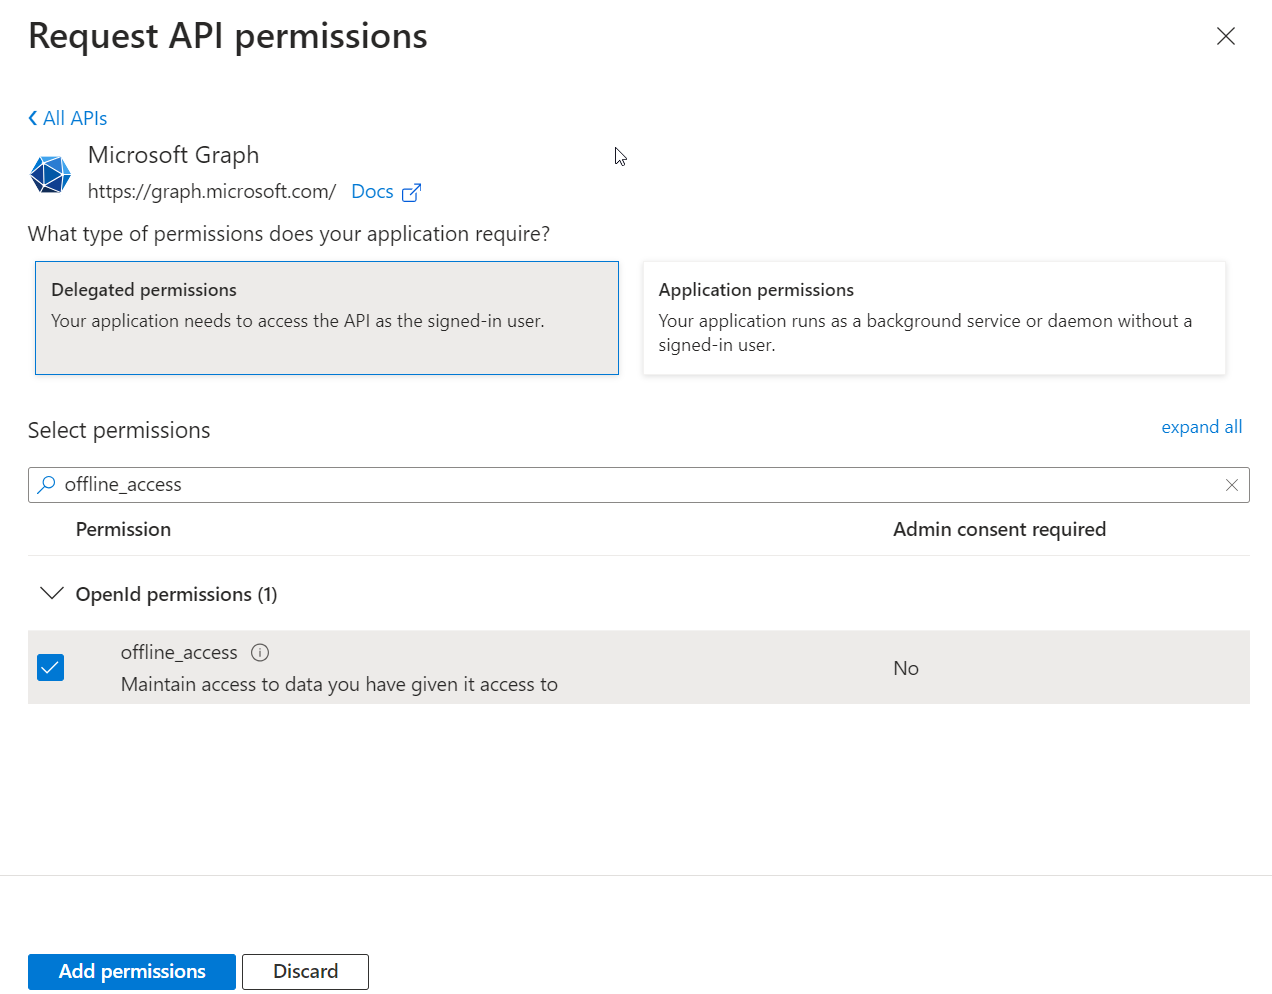
- Click on Delegated permissions.
- On the Request API permissions screen, under Select permissions, search for
offline_access. Click the checkbox next to offline_access.
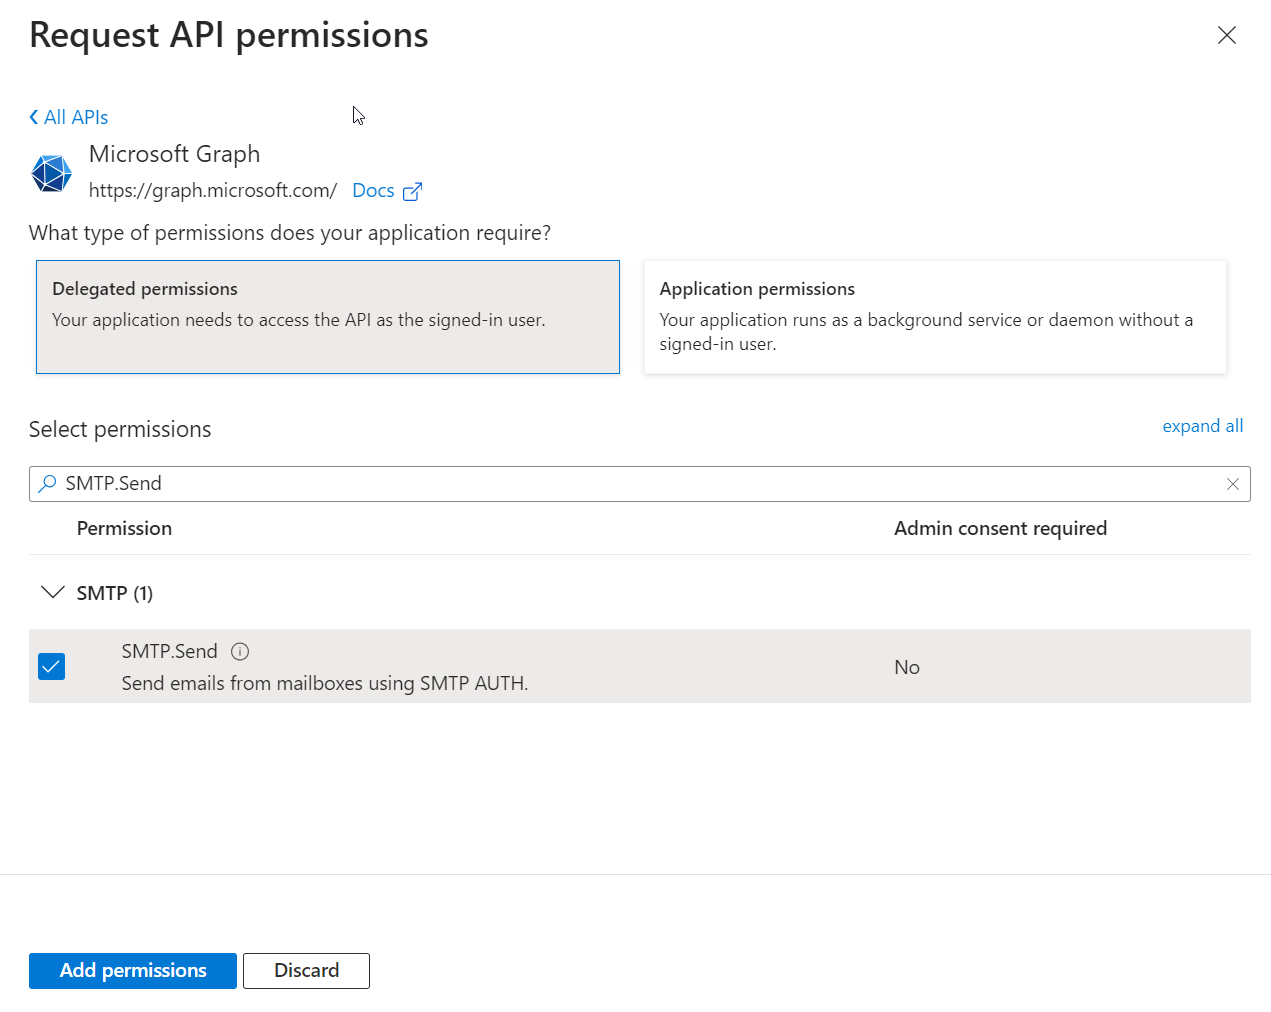
- On the Request API permissions, under Select permissions, search for
SMTP. Click the checkbox next to SMTP.Send.
- Click the Add permissions button to save the changes. All the permissions you selected are displayed on the screen.
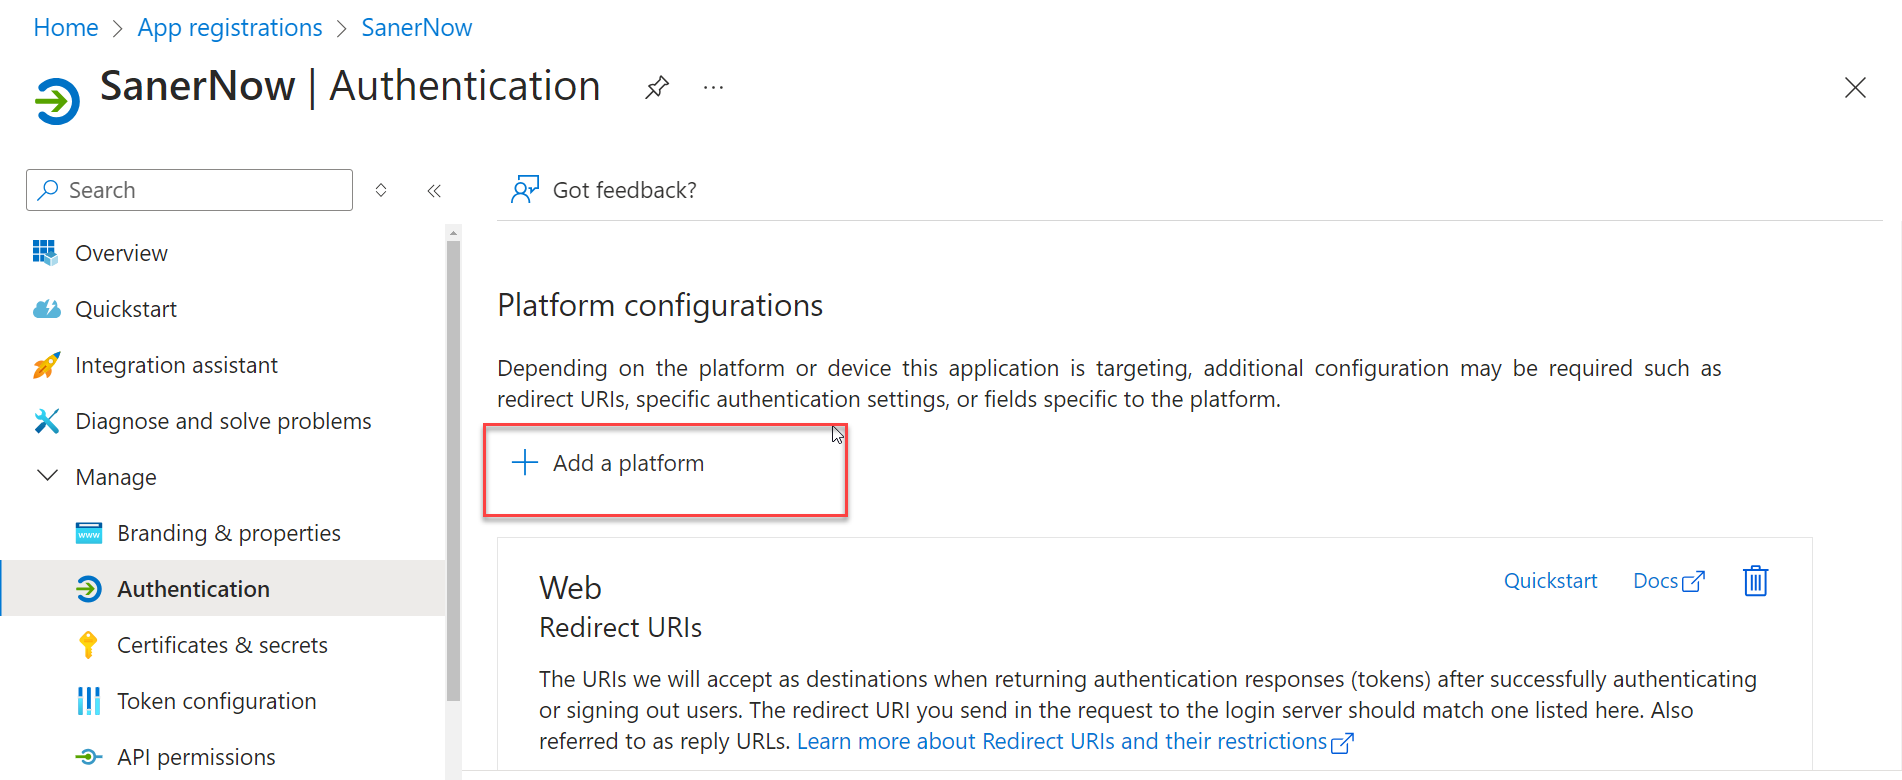
- Navigate to Manage > Authentication.
- Click on the + symbol next to Add a platform.
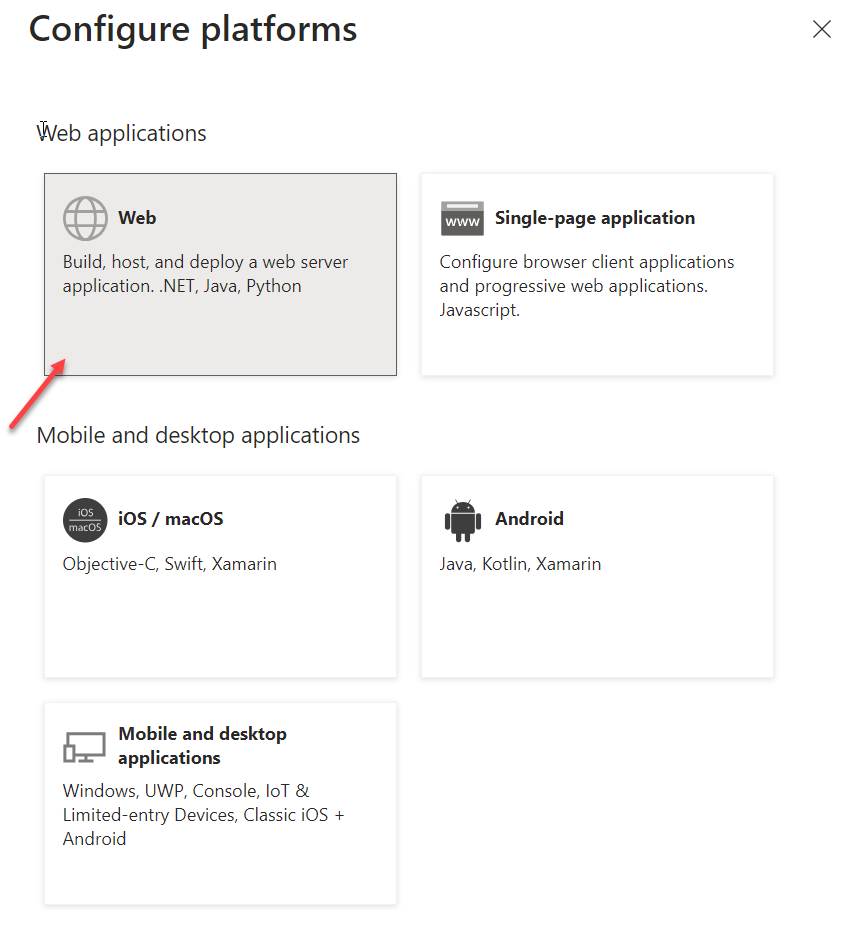
- On the Configure platforms screen, choose Web.
- In the Redirect URIs textbox, input the redirect URI as http://localhost
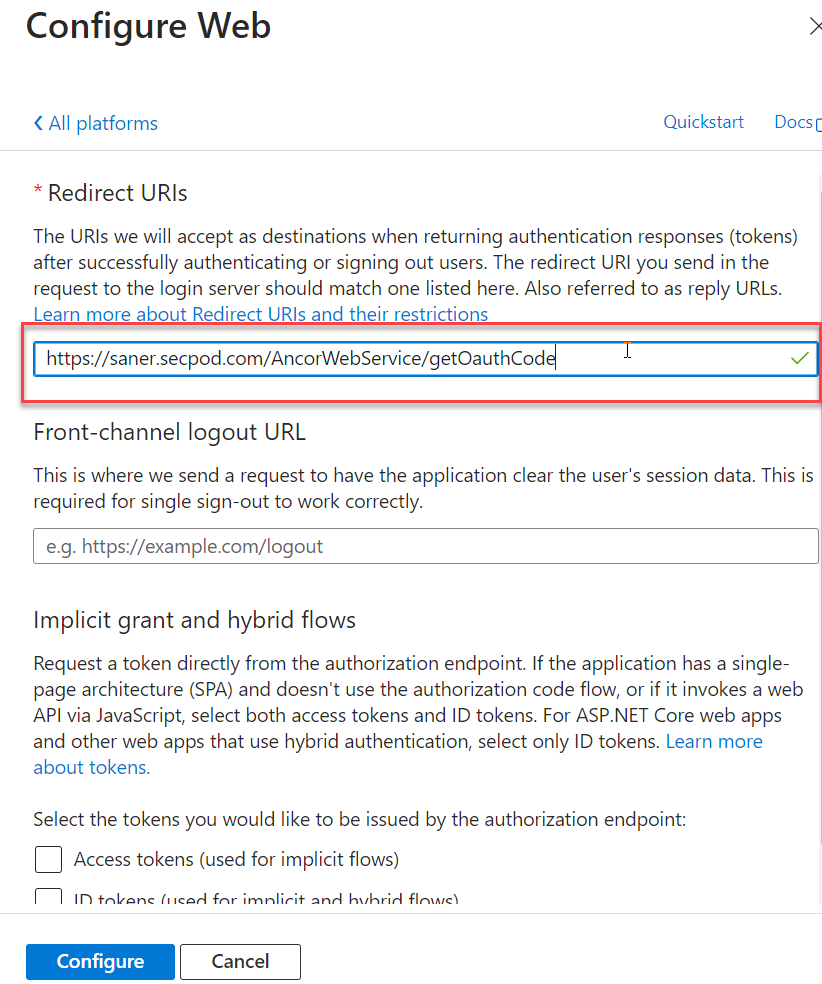
- Click the Configure button to save the changes.
- Log in to the Microsoft 365 admin center. Navigate to Users > Active Users.
- Select the mailbox from the list for which you have configured the Client ID and Client Secret.
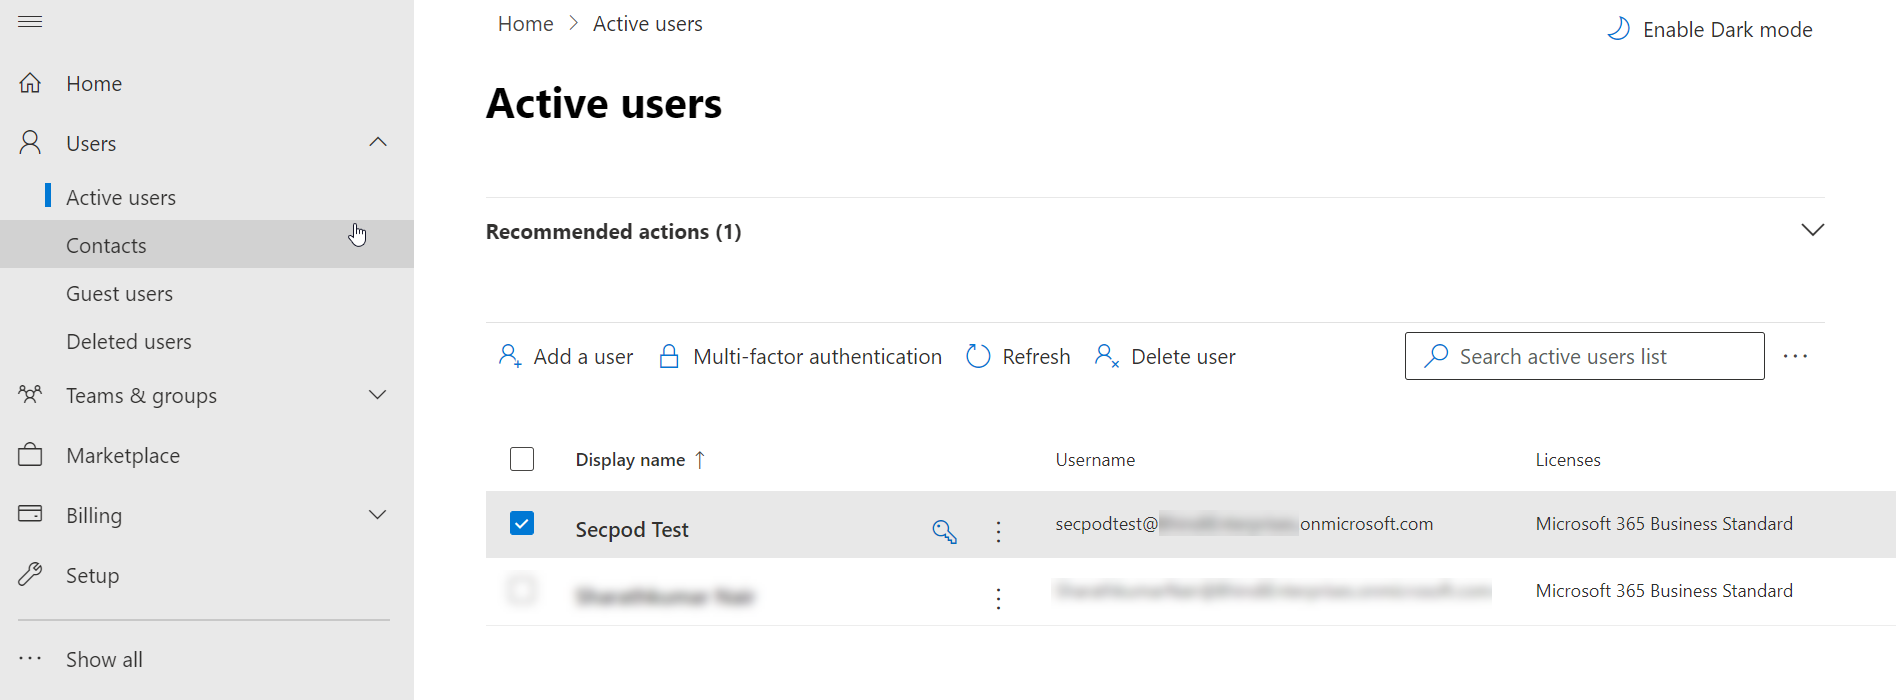
- Select Mail from the flyout menu. Click on Manage email apps.
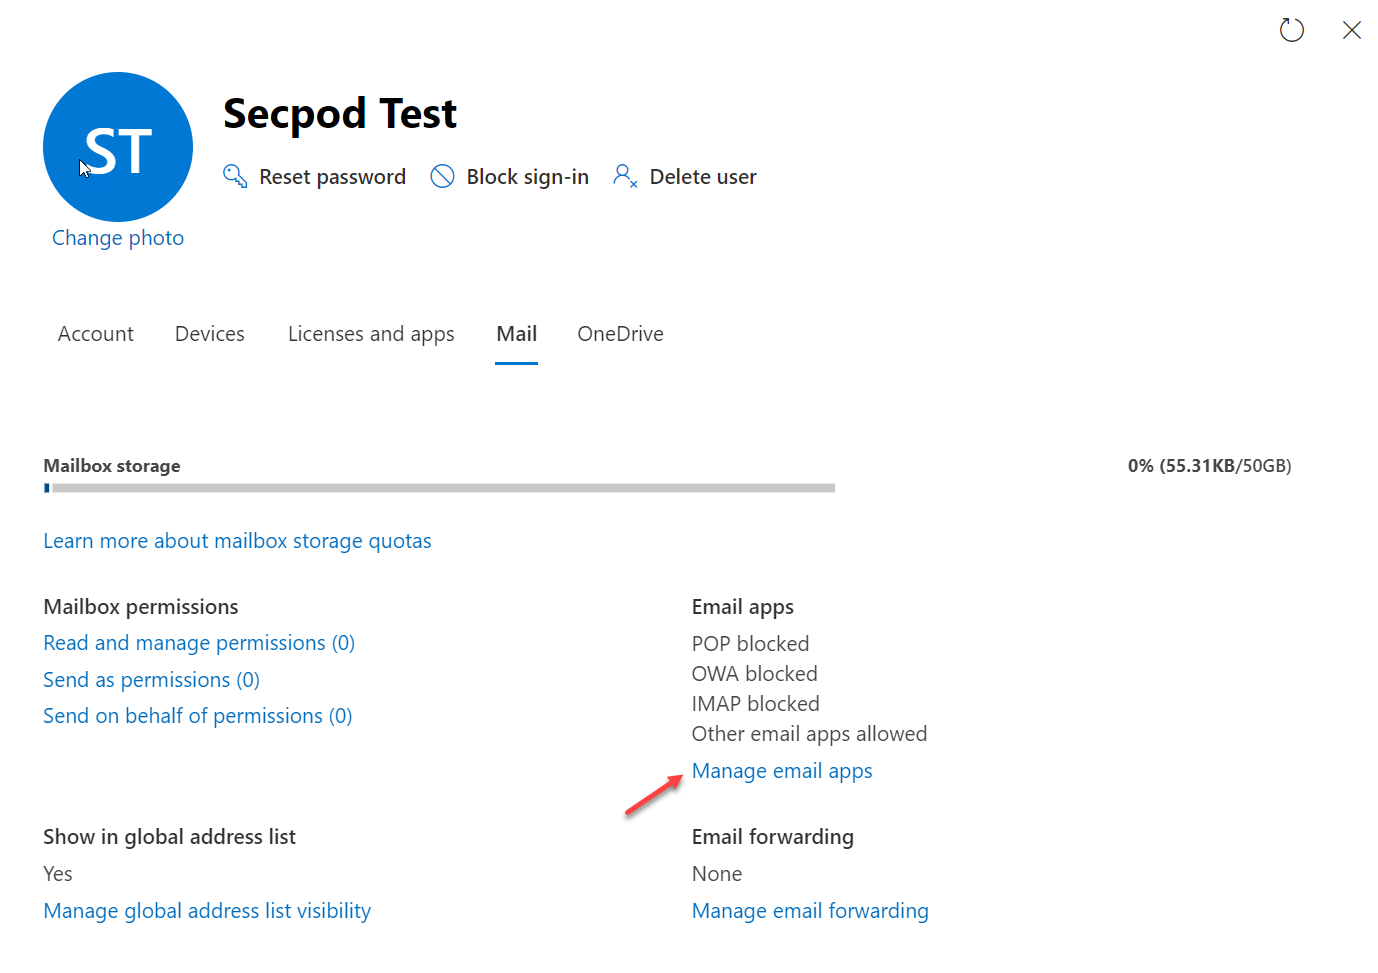
- On the Manage email apps screen, ensure the Authenticated SMTP setting is enabled.
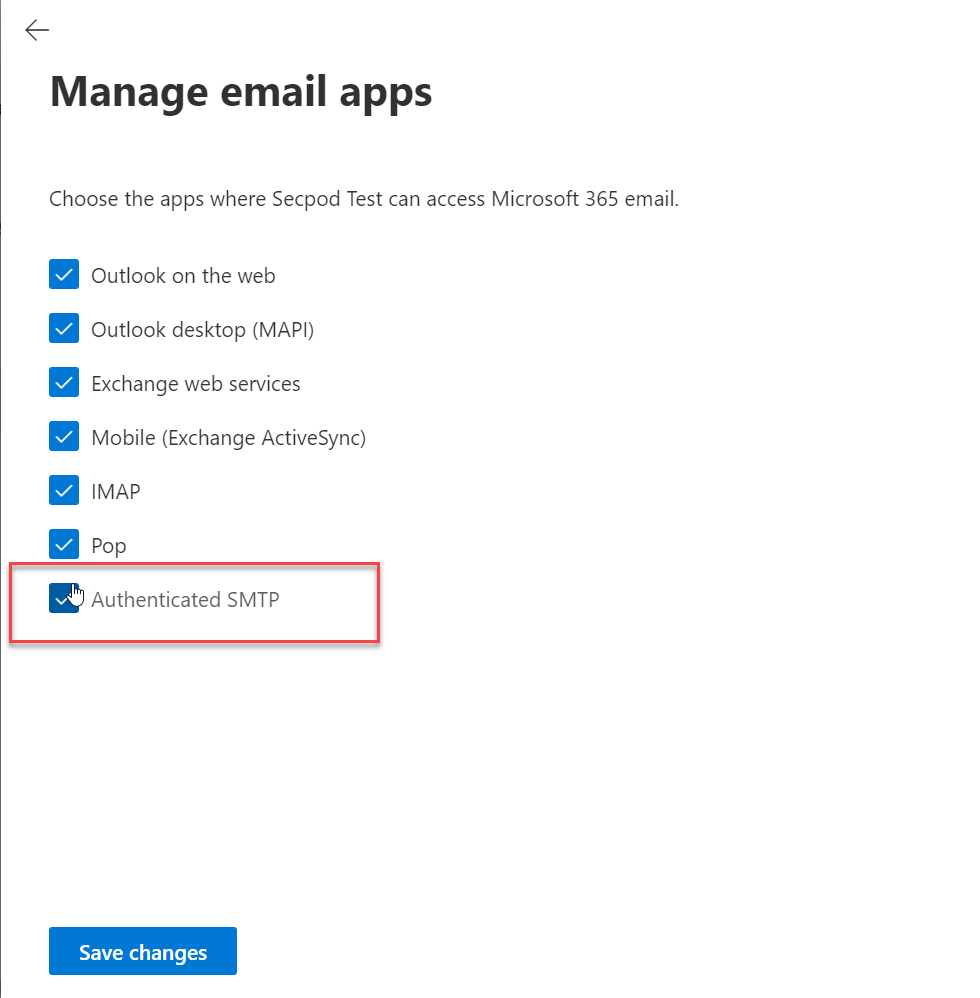
- Click the Save changes button.
Google Customers (Gmail)
- Sign in to the Google Developers Console. Click the Terms of Service checkbox and then click the Agree and Continue button.
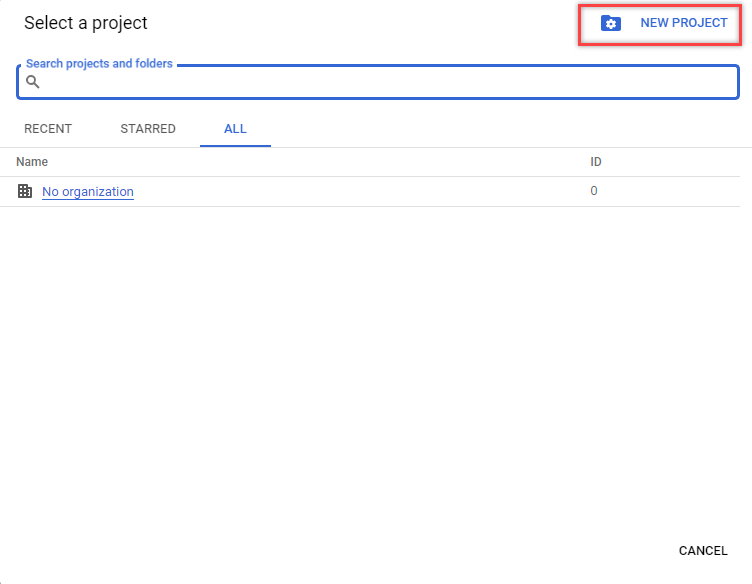
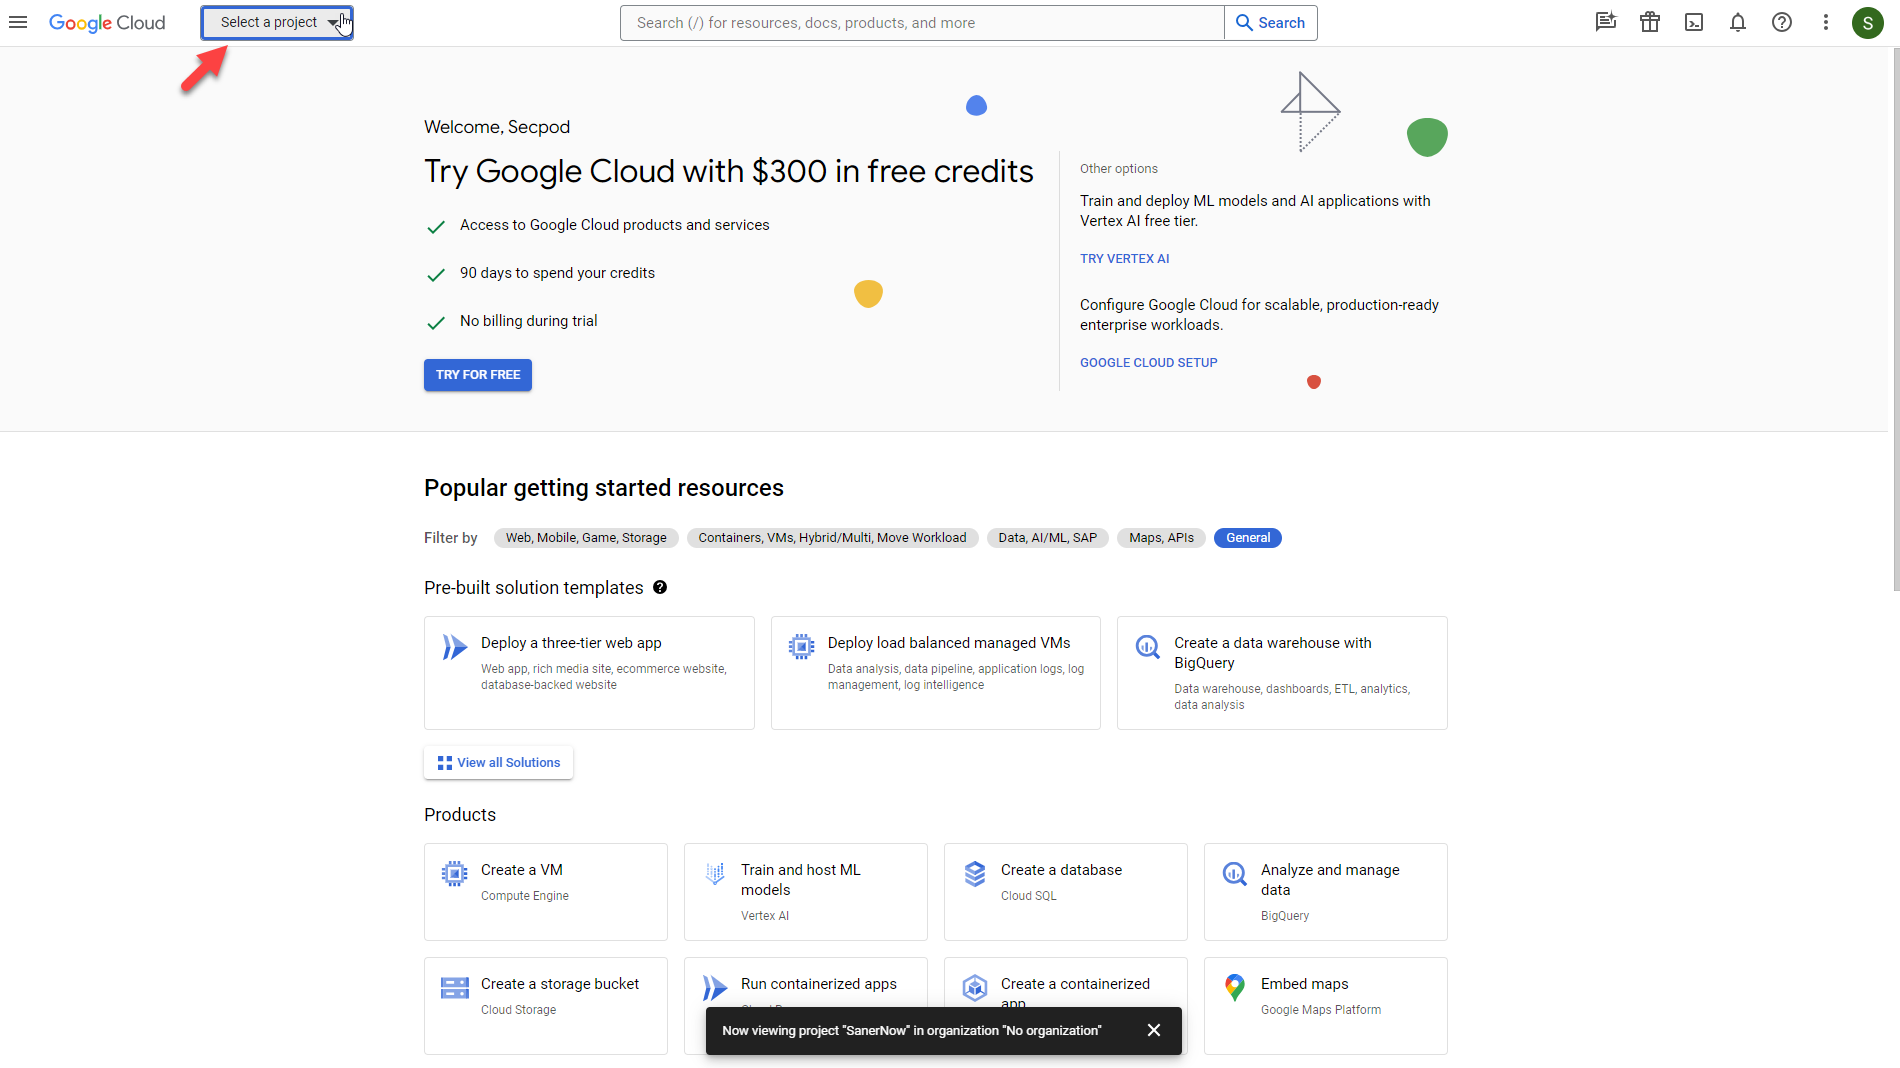
- Click the Select a project drop-down menu on the left side of the page. A pop-up window will appear on the screen.

- Click New Project on the right side of the pop-up window.
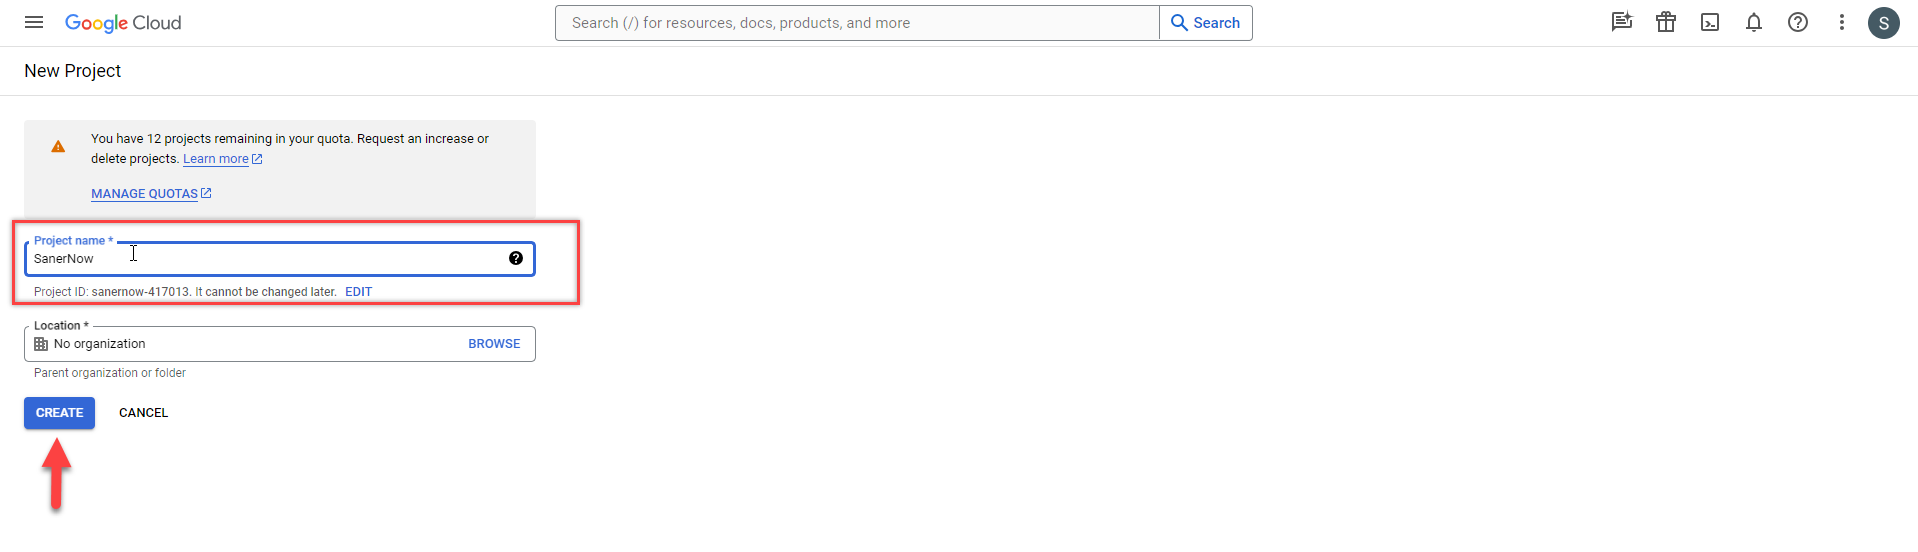
- Fill in the Project name and click the Create button. For memorability, call it Eudoramail OAuth or the like.
- Once the project is created, click the menu icon on the left side of the page. Select the project you created.
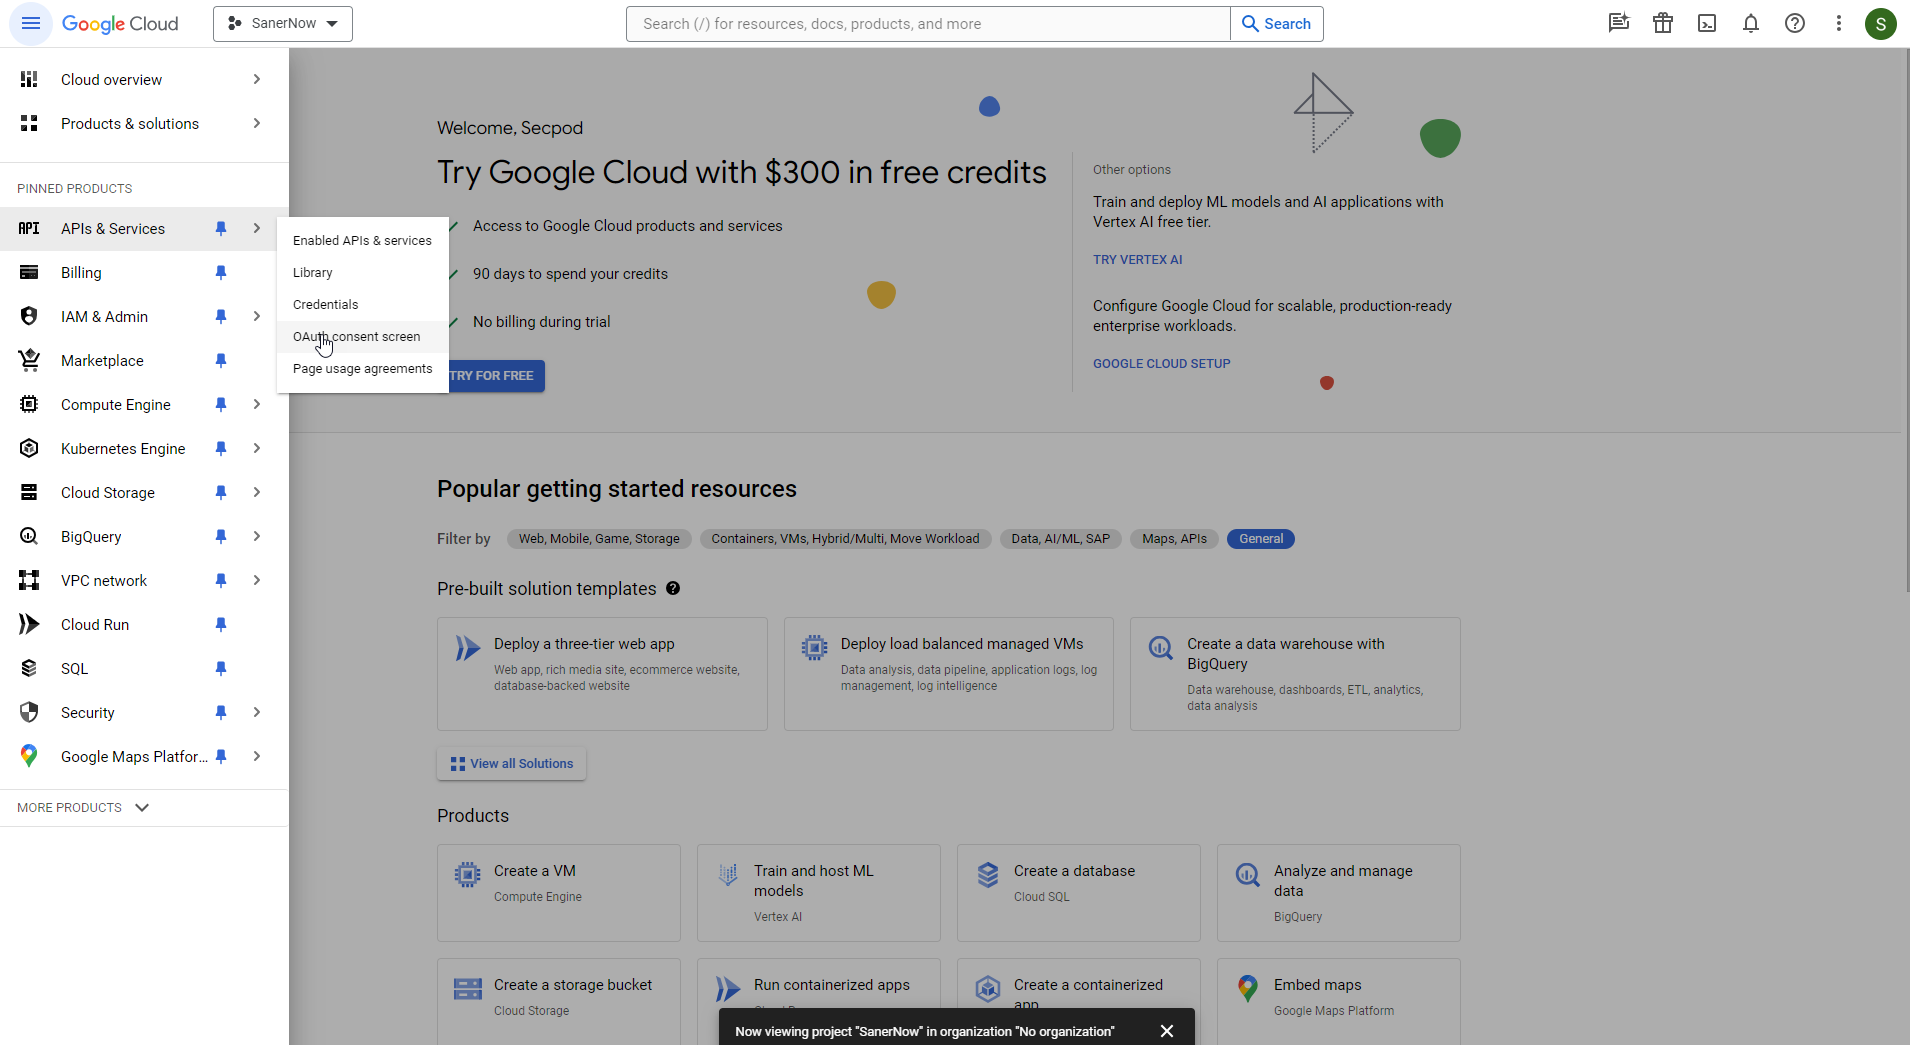
- Click the ≡ icon on the left side of the page. Select APIs & Services > OAuth consent screen.
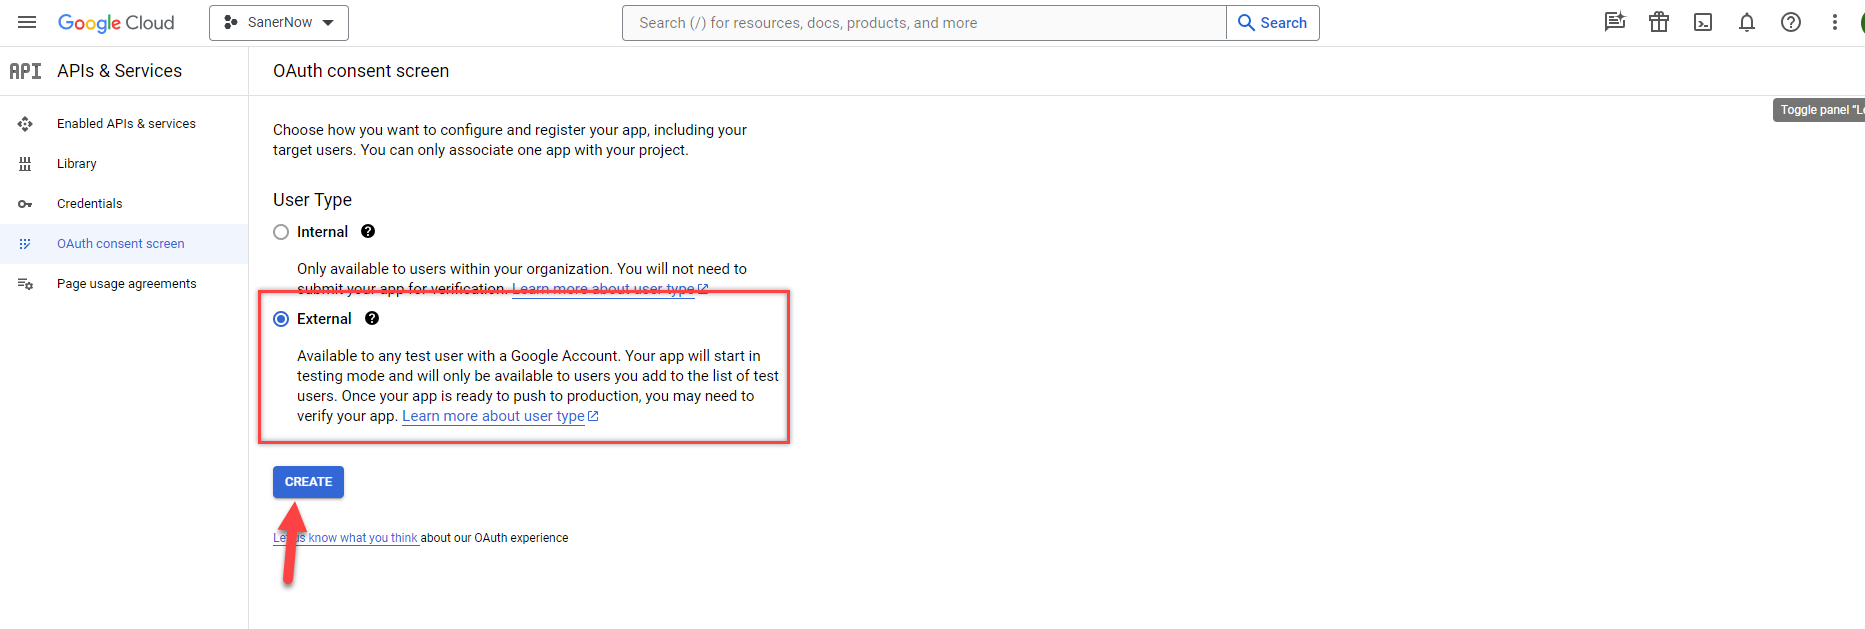
- Under User Type, select External. Click the Create button.
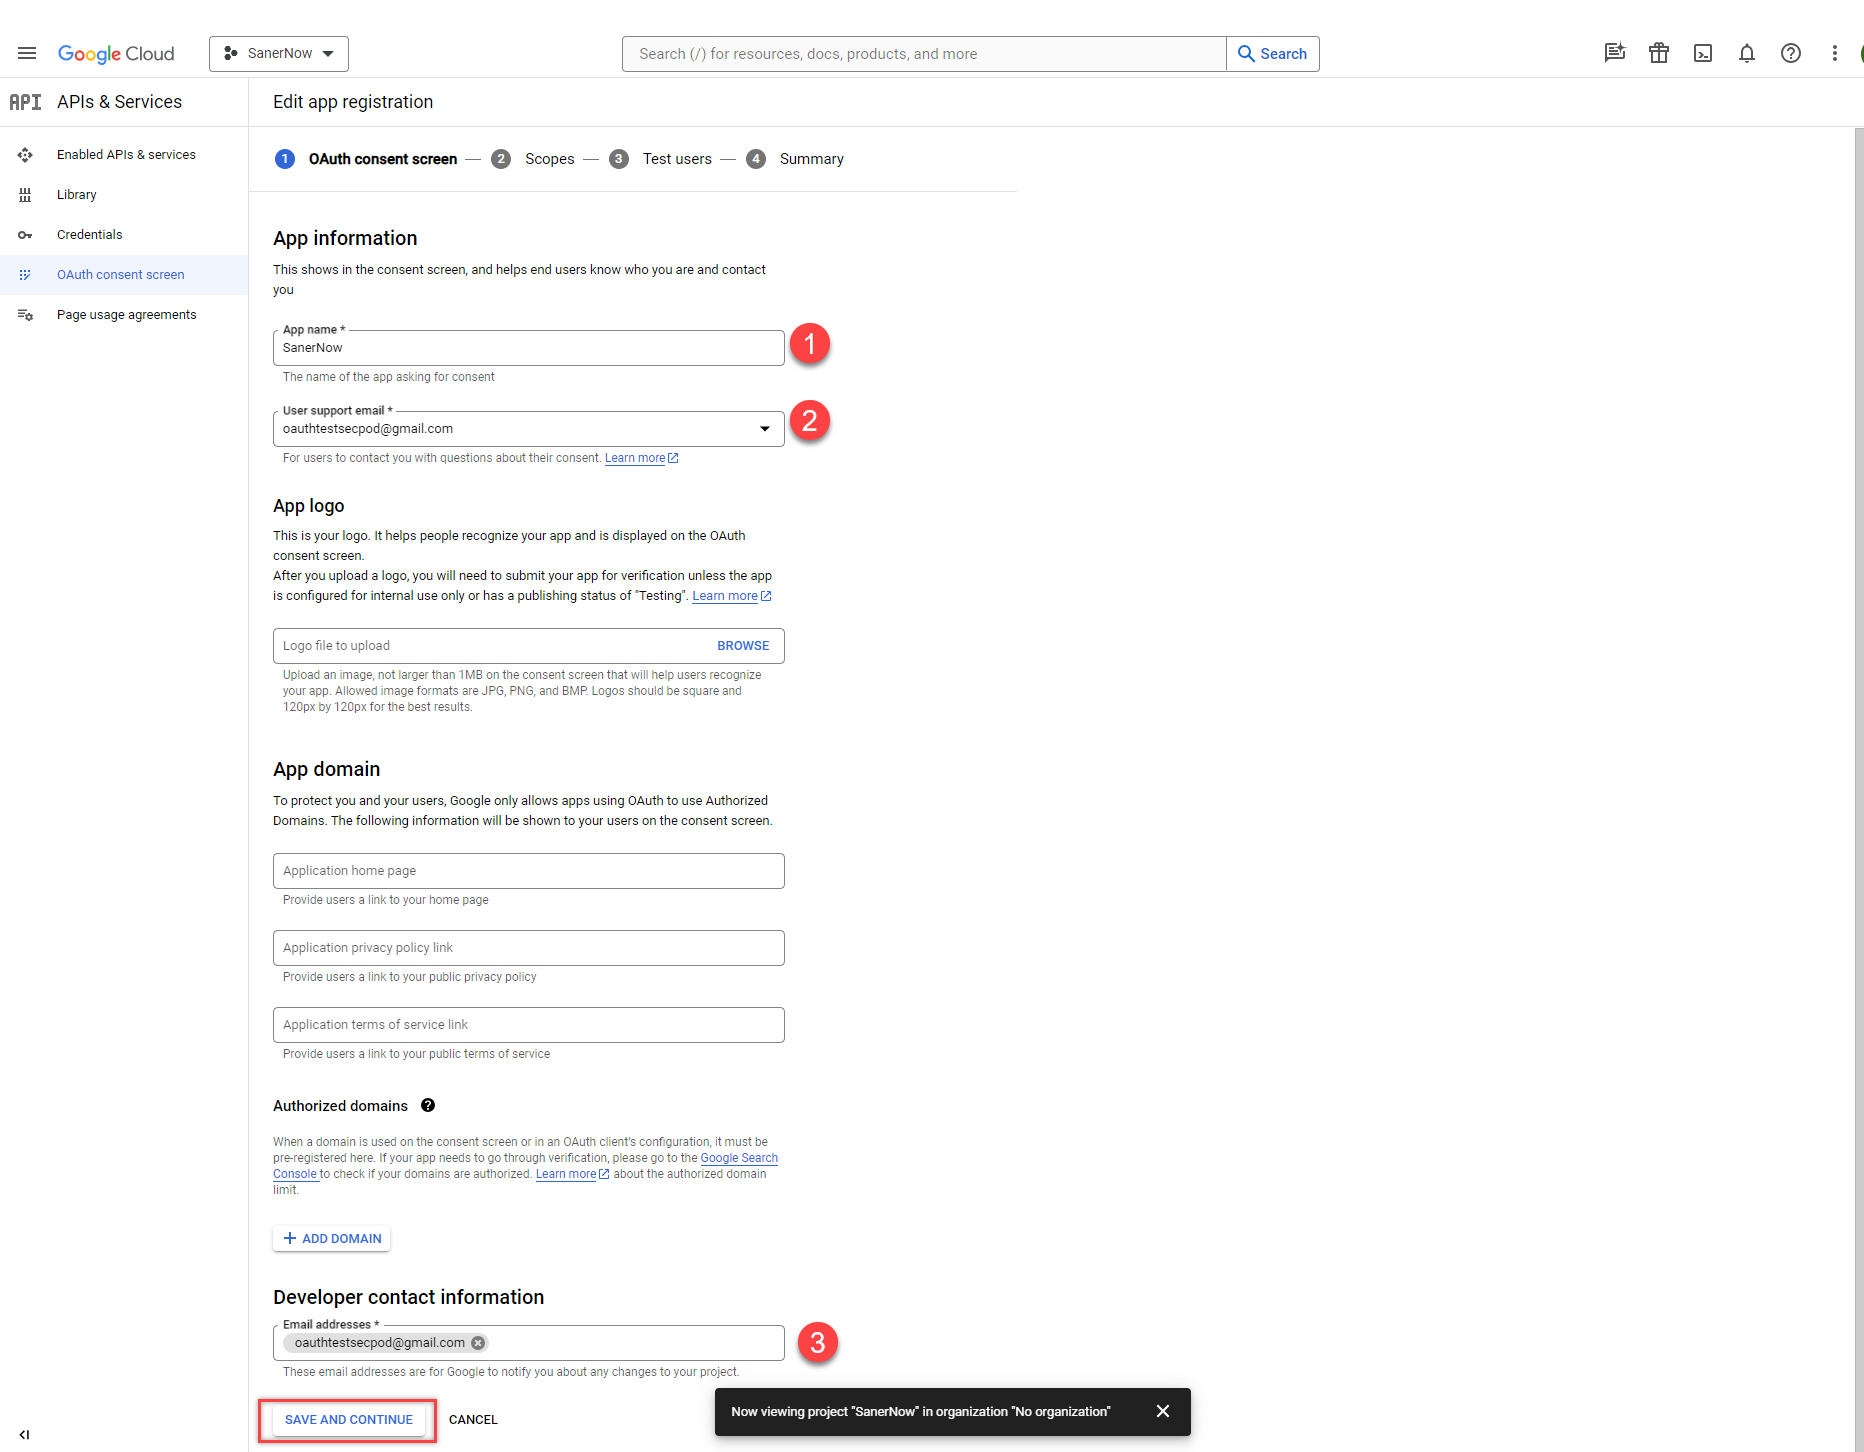
On the OAuth consent screen, provide the below inputs.
- App name – Provide the name of the app for which you are provisioning OAuth authentication. In this case, it will be Eudoramail.
- User support eMail — Provide an eMail where the users can contact you regarding their consent. If you are setting up OAuth for yourself only, this can be your own eMail.
- Developer contact information — Provide an eMail address for Google to contact you if there are any changes to the project.
Click the Save and Continue button to proceed to the next screen.
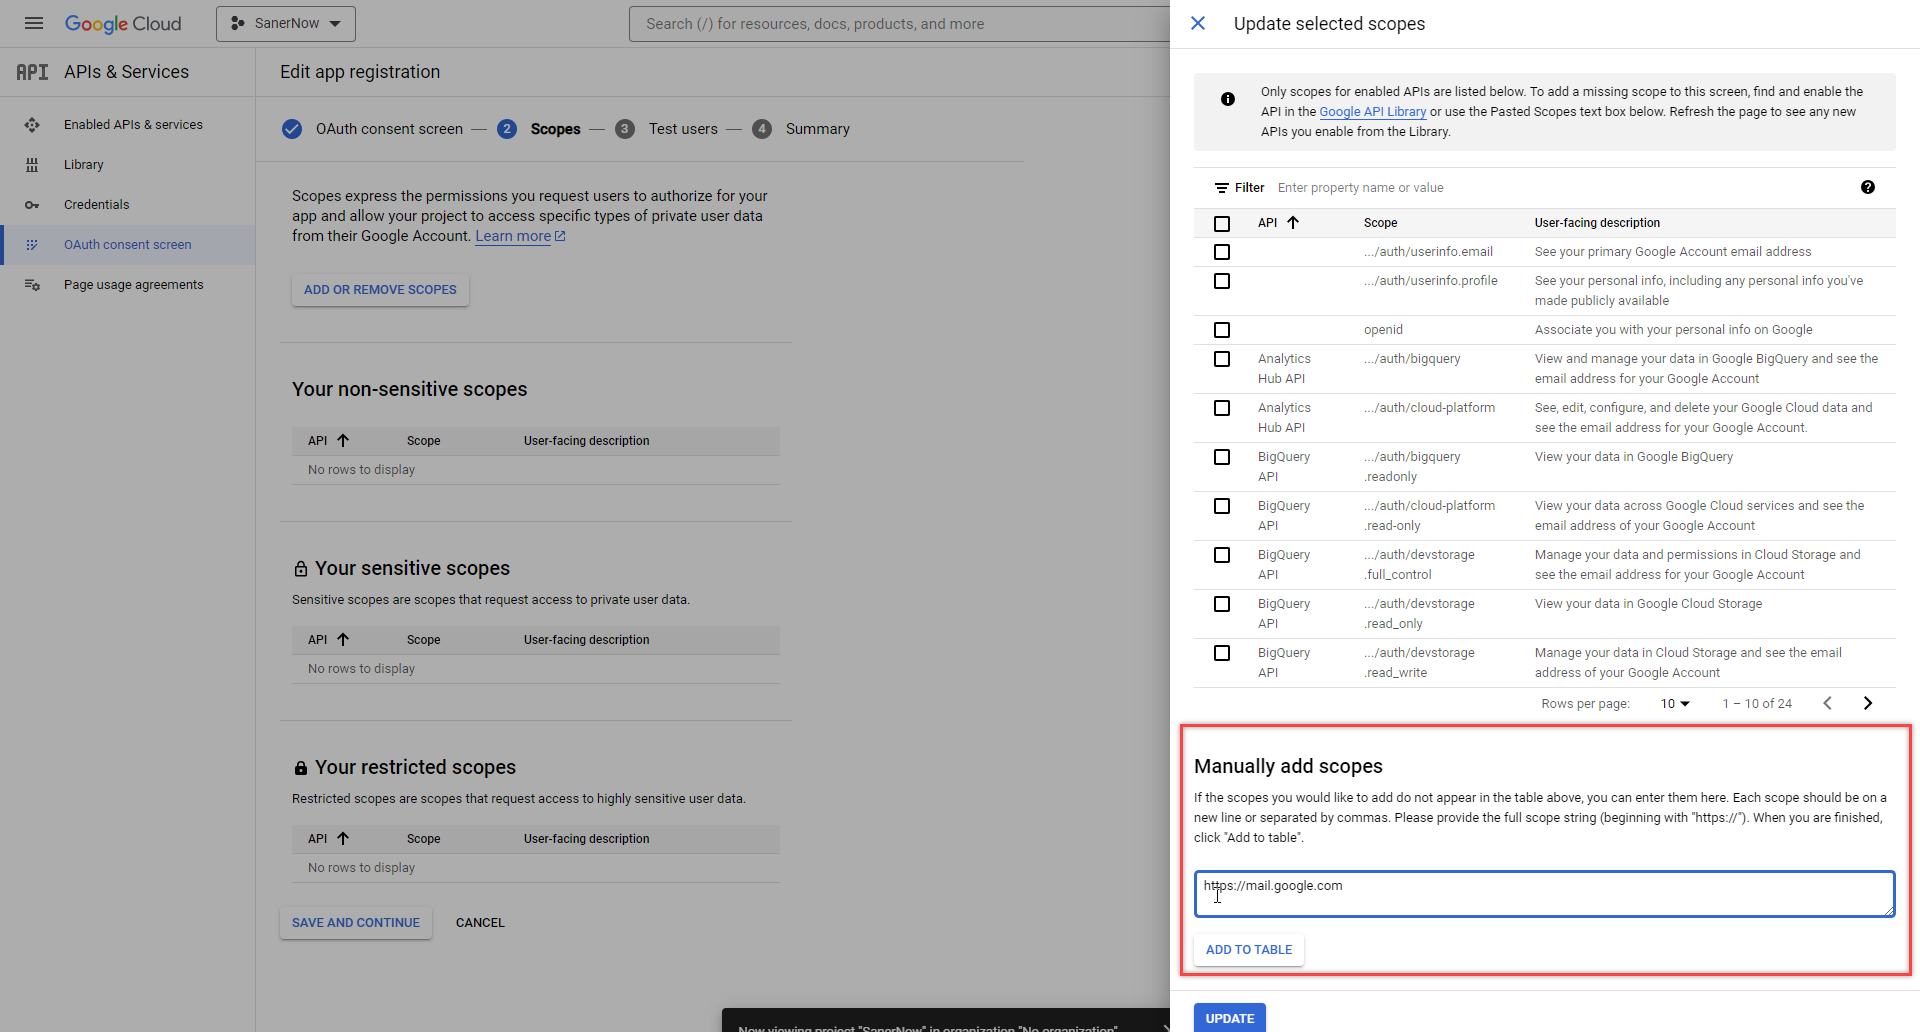
- Click the Add or Remove Scopes button. A new window will appear on the right side of the screen.

- Add https://mail.google.com under the Manually add scopes section. Click the Add to Table button.
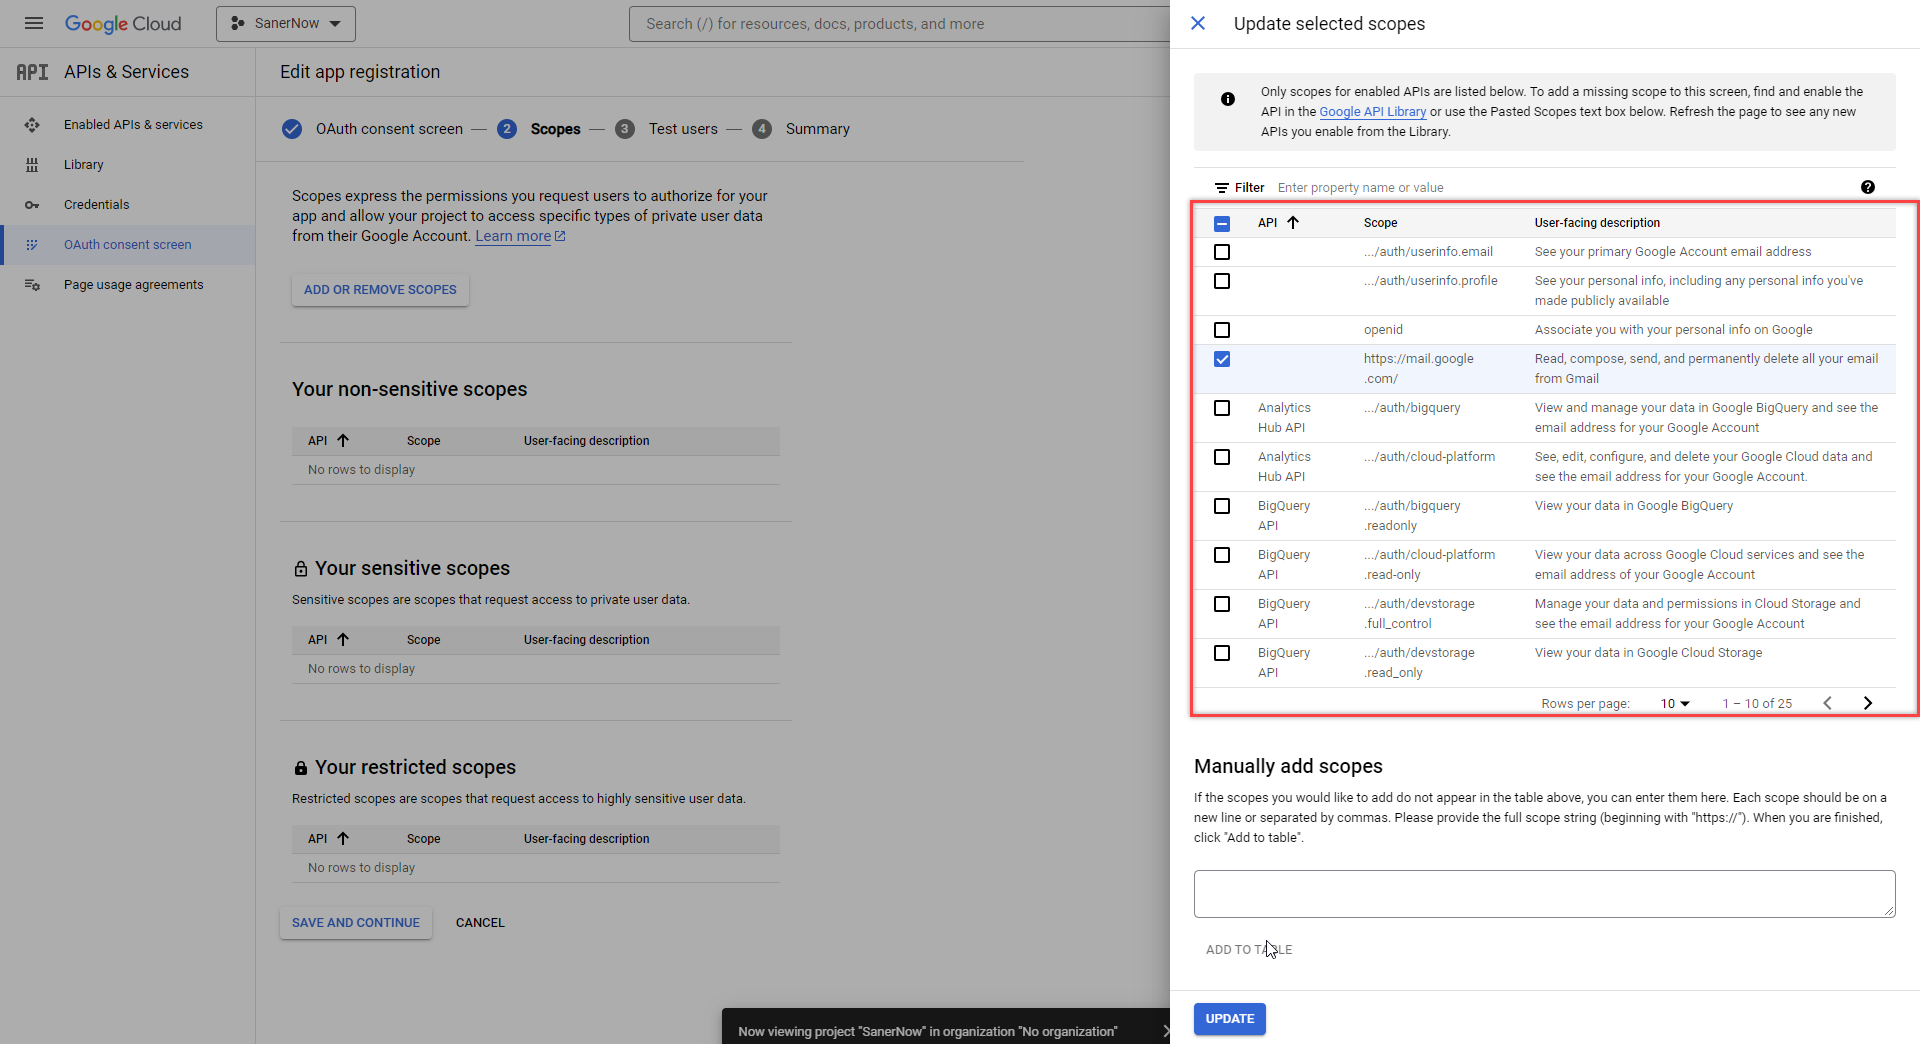
- The newly added entry is displayed on the Filter table. Click the Update button.
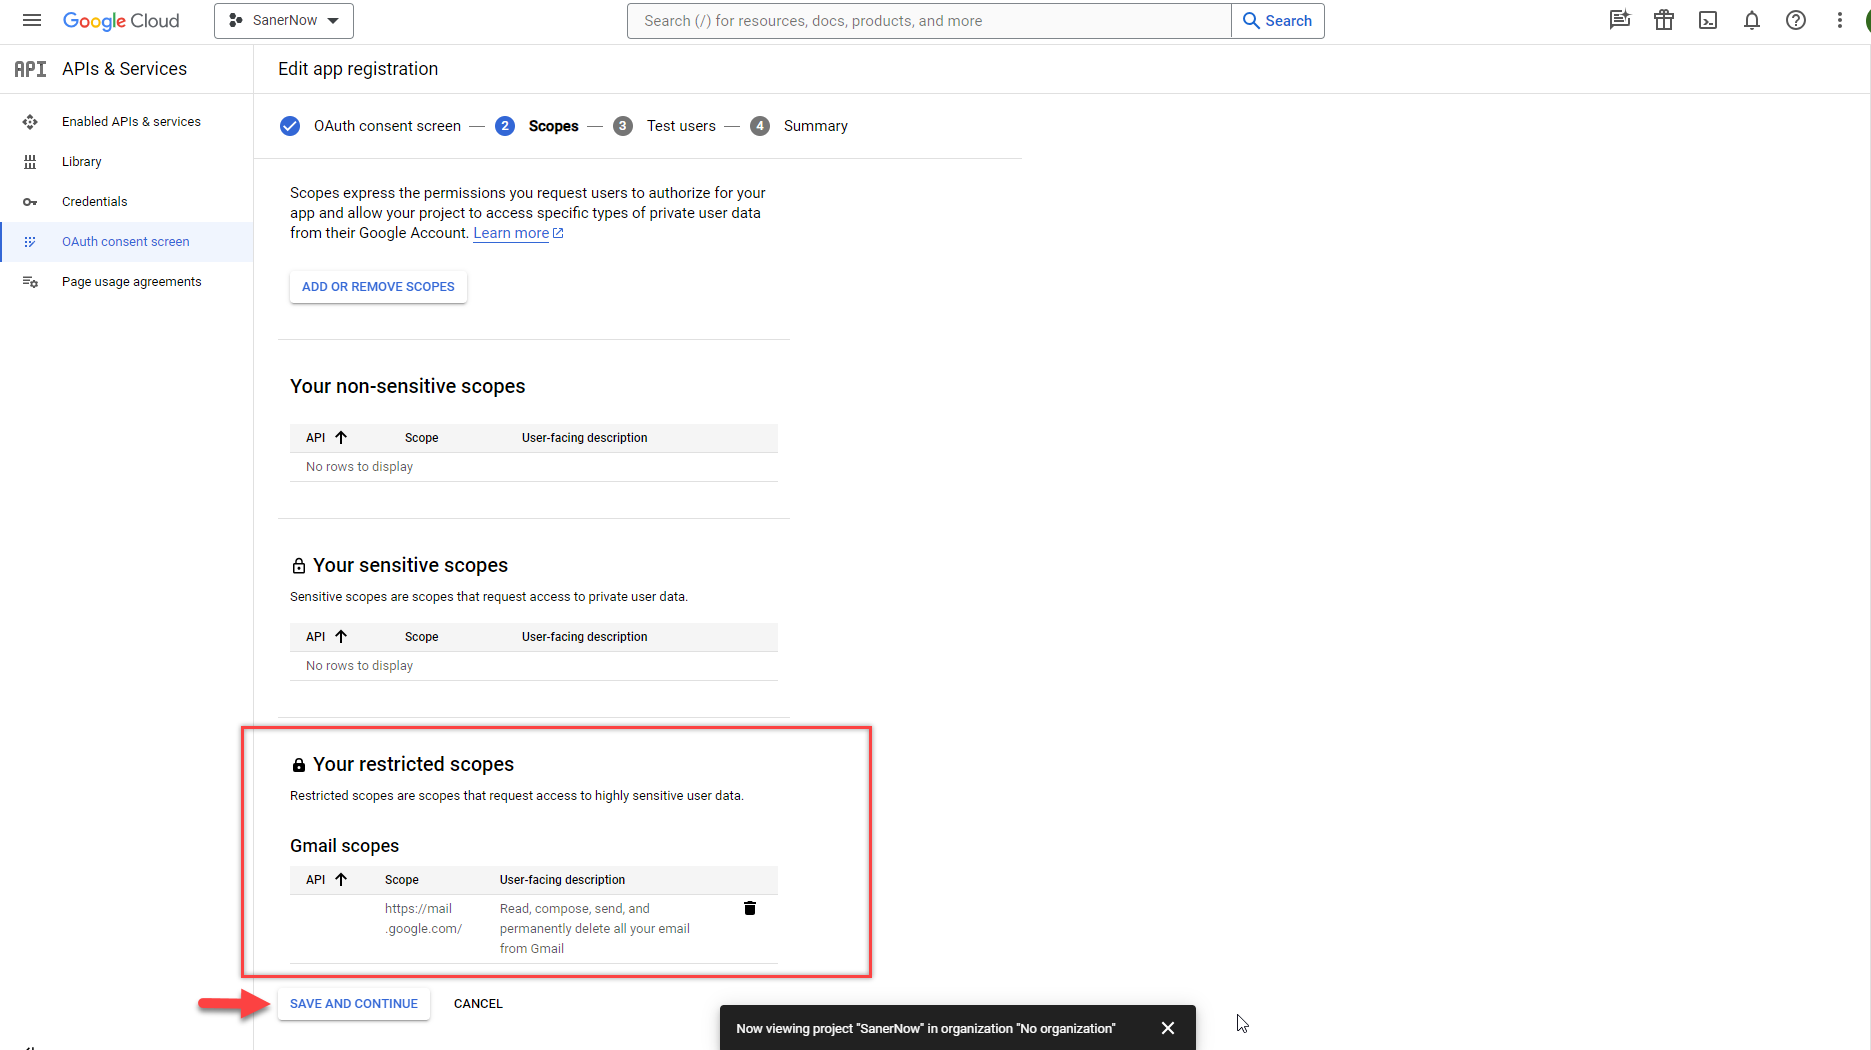
- The newly added entry is under Your restricted scopes section. Click the Save and Continue button to proceed to the next screen.
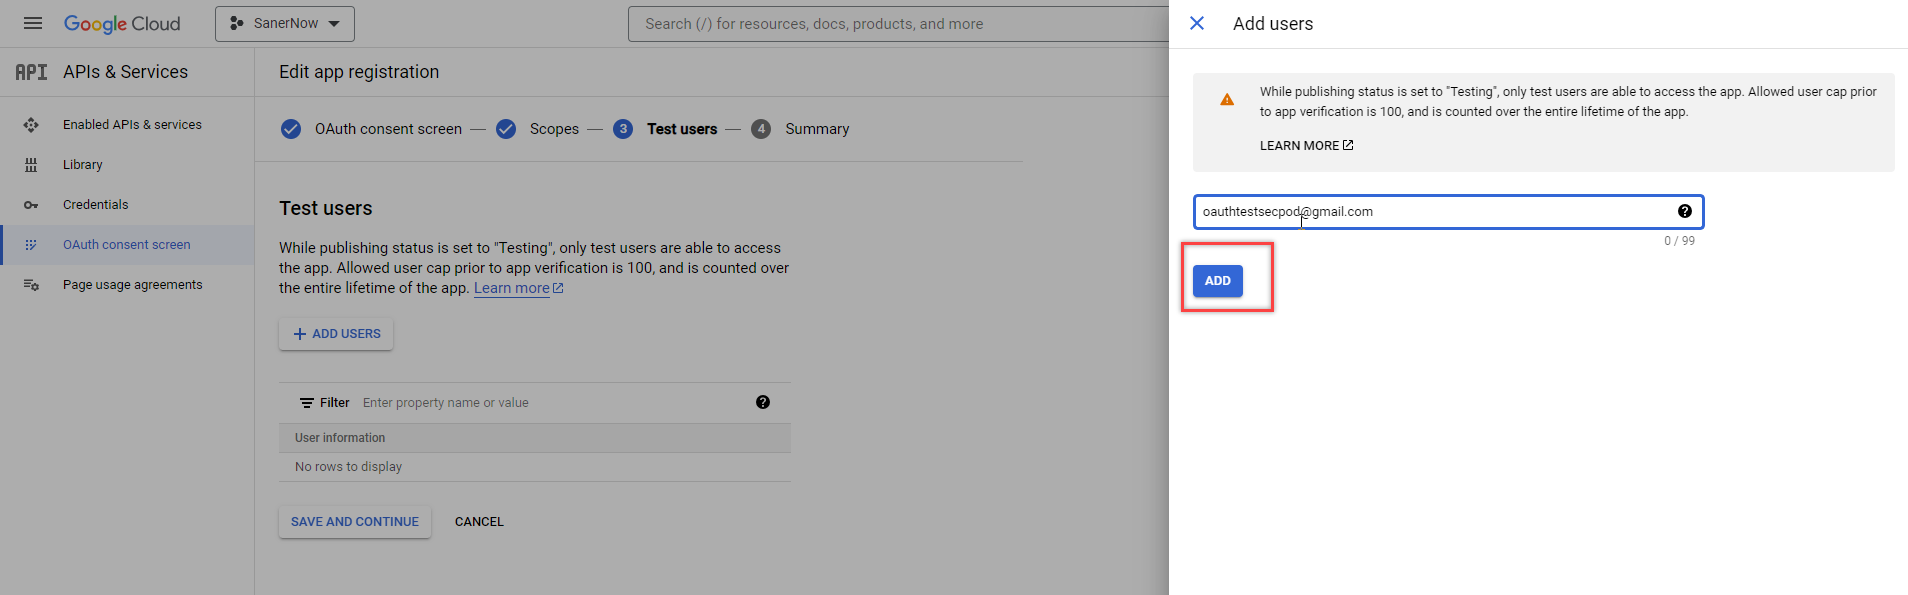
- Click the Add users button on the Test users screen. A pop-up window appears on the screen. Enter the email address you want to use to authenticate using the OAuth authentication. Click the Add button.
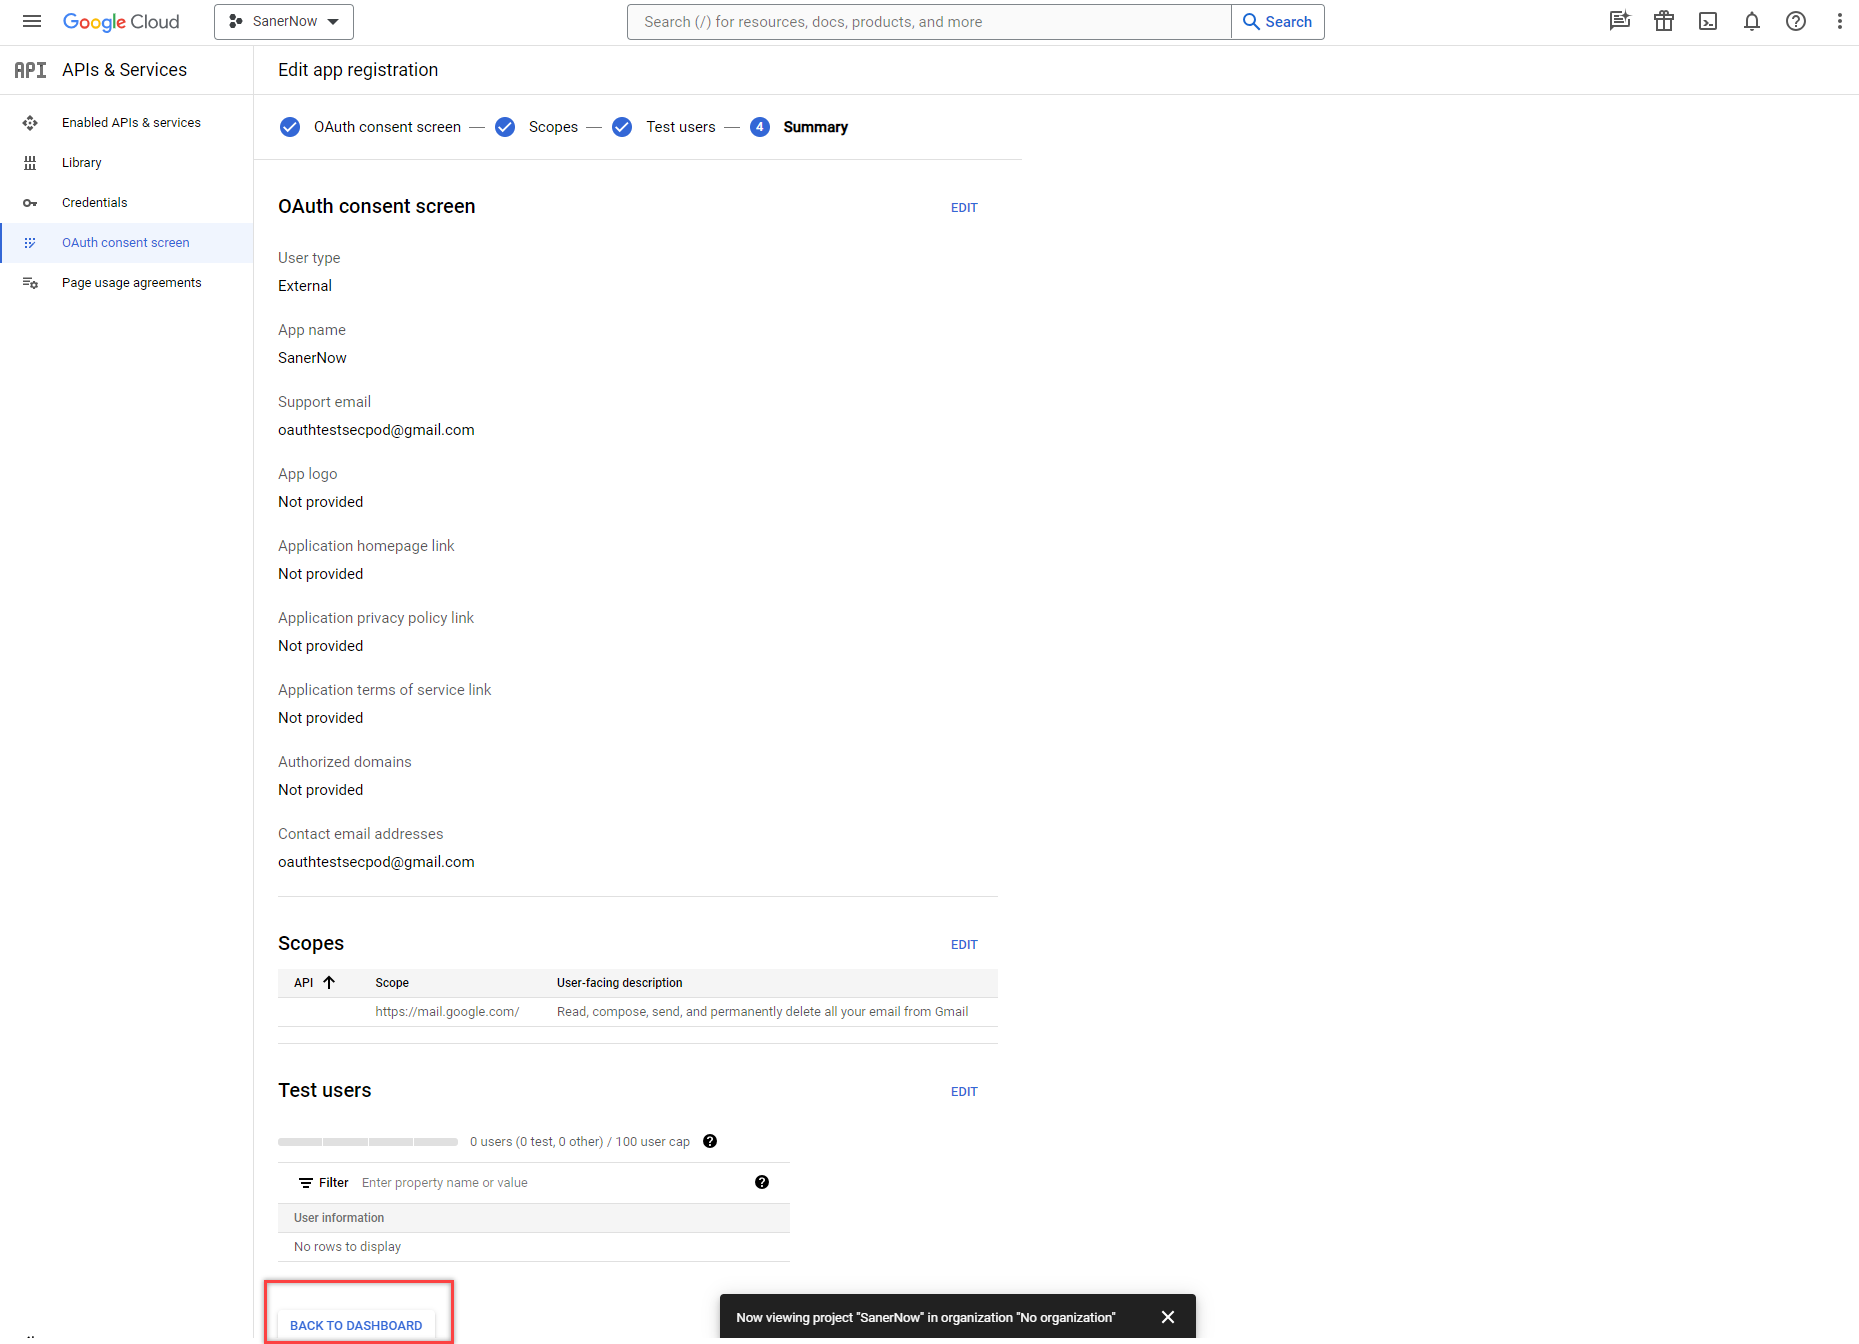
- Click the Back to Dashboard button on the Summary page.
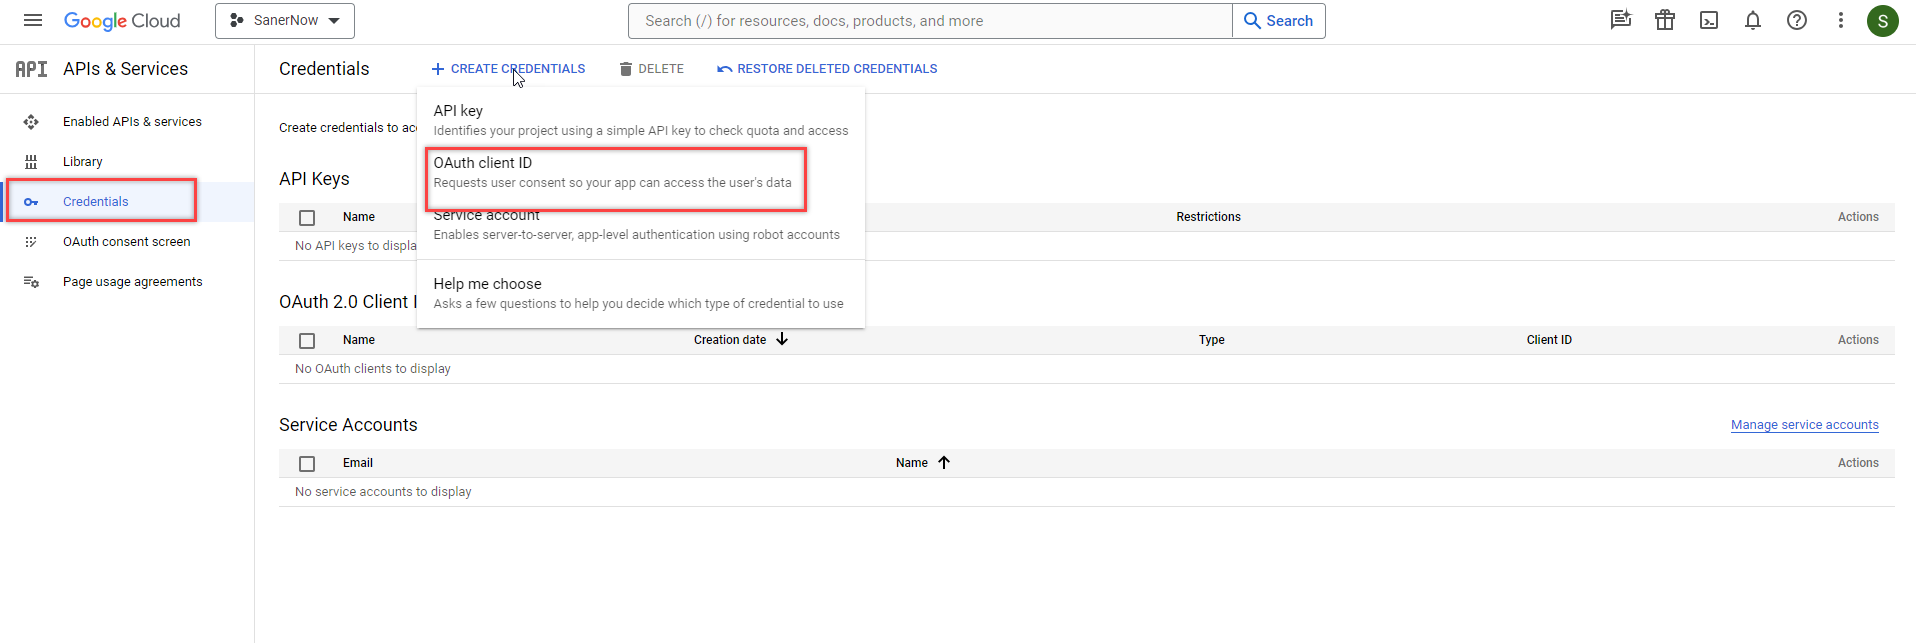
- Click Credentials under the APIs & Services menu. Click the Create Credentials menu on the right side of the page and select OAuth client ID.
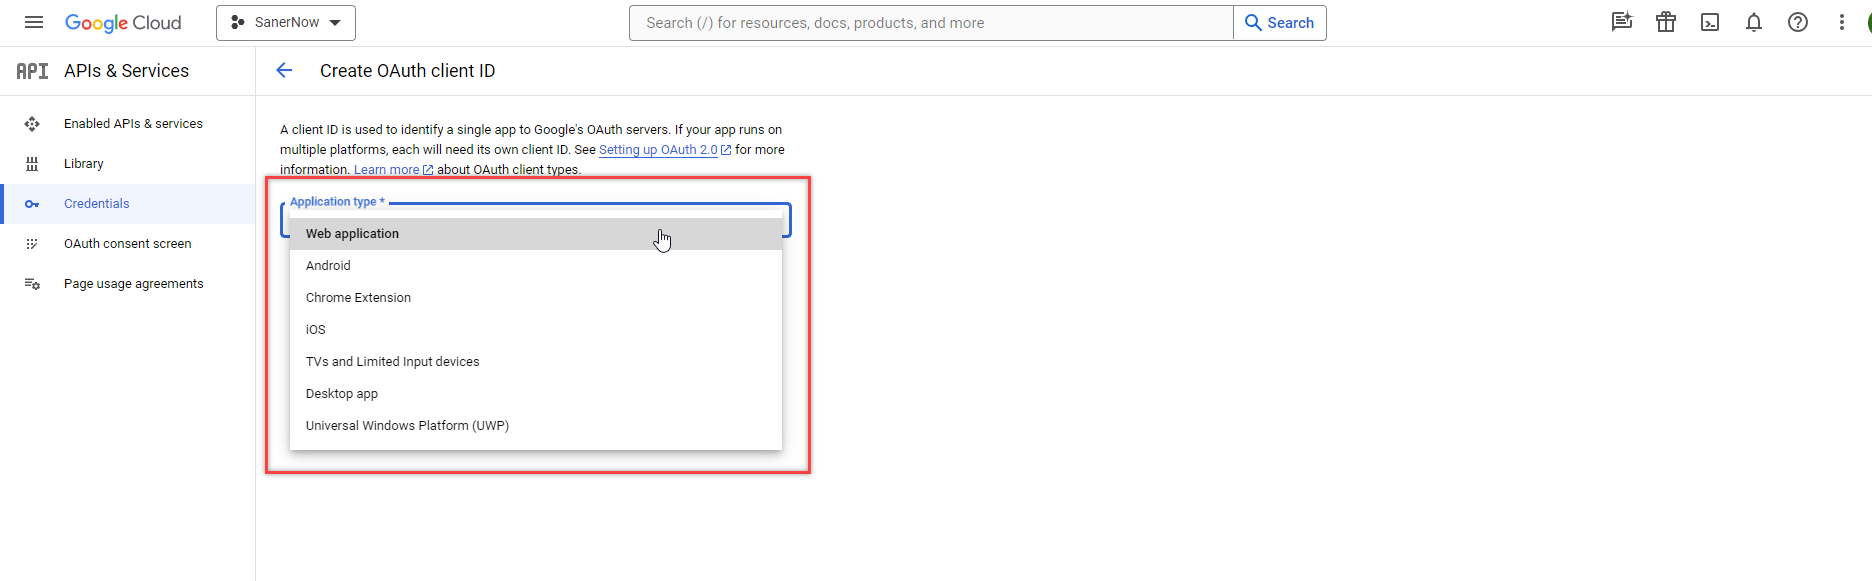
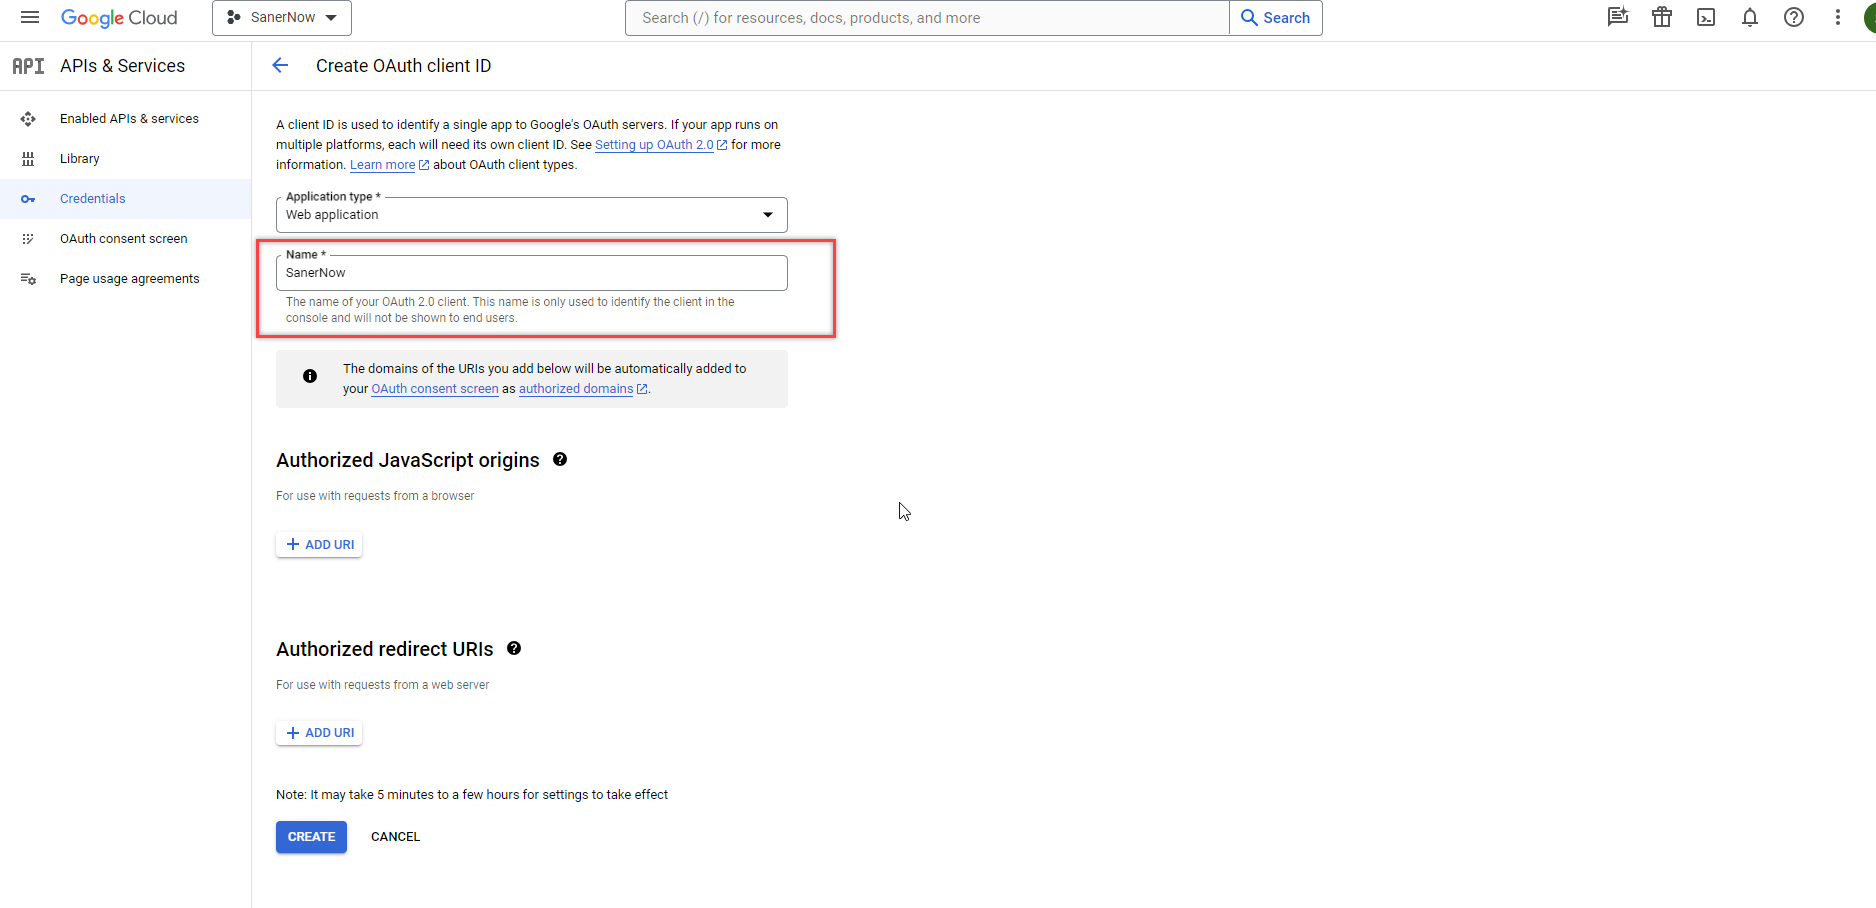
- On the Create OAuth client ID page, select Web application in the Application type drop-down box.
- In the Name textbox, input
Eudoramail.
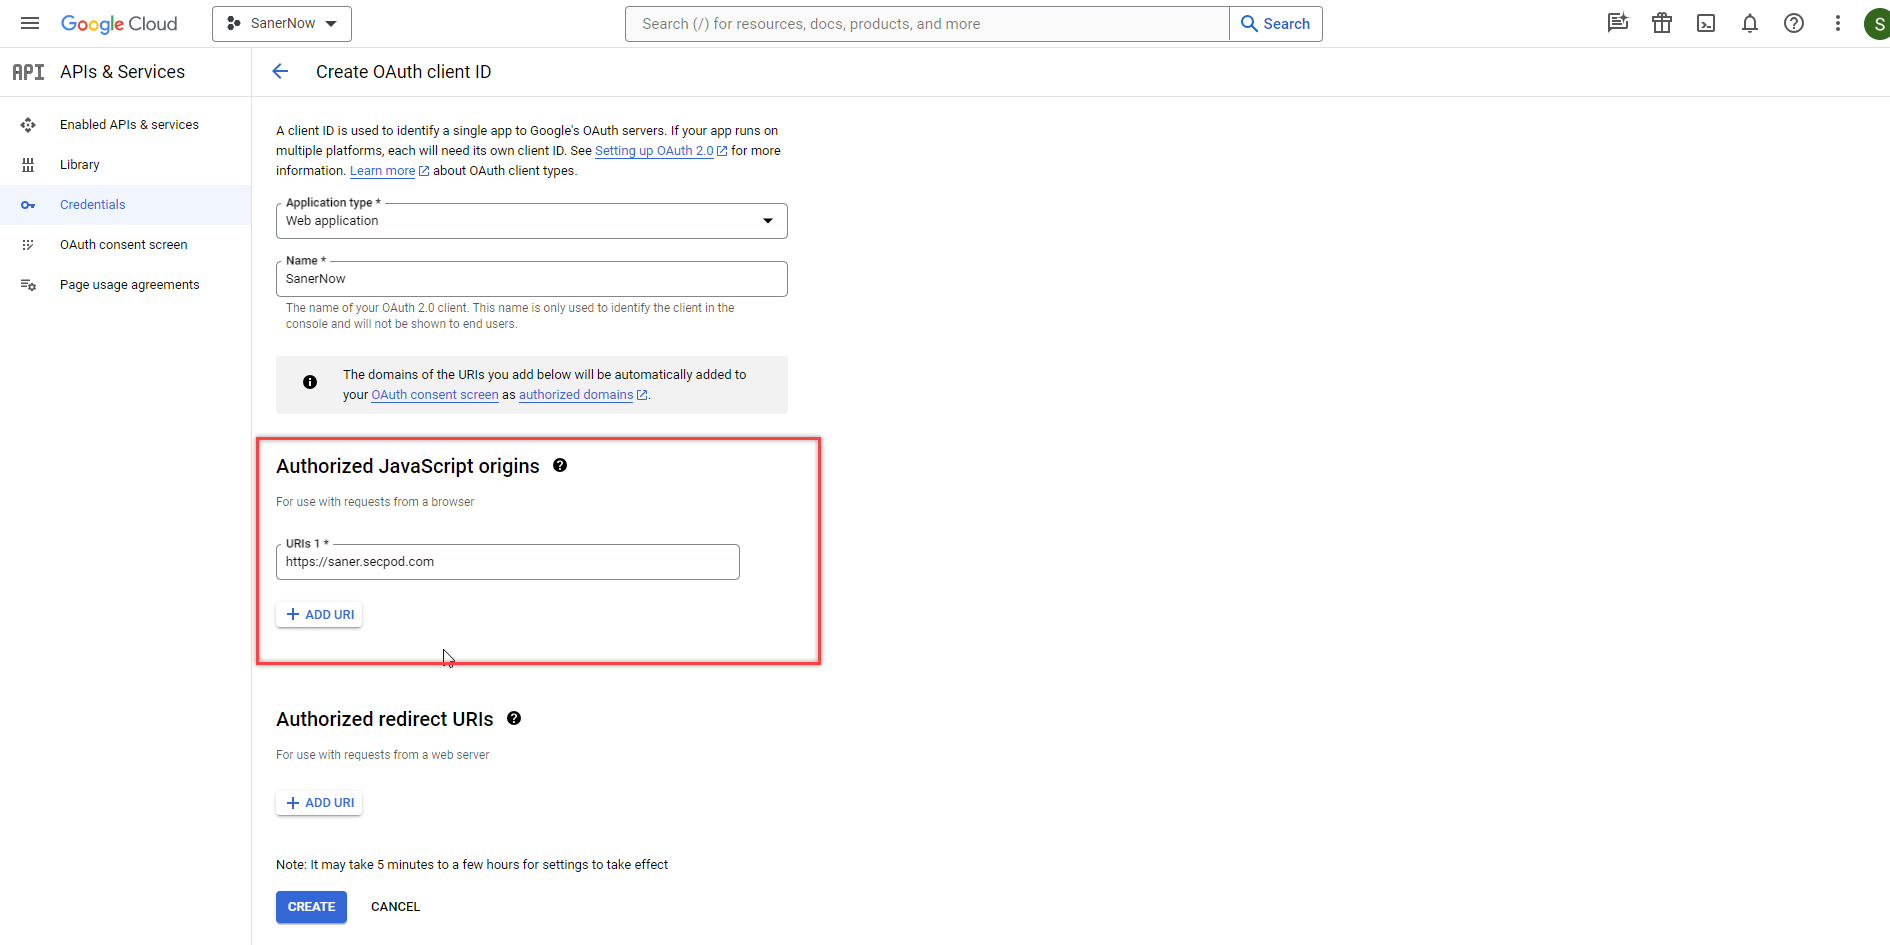
- Click the Add URI button under the Authorised Javascript origins section. Input http://localhost.
- Click the Add URI button under the Authorised Redirect URIs section. Input http://localhost.
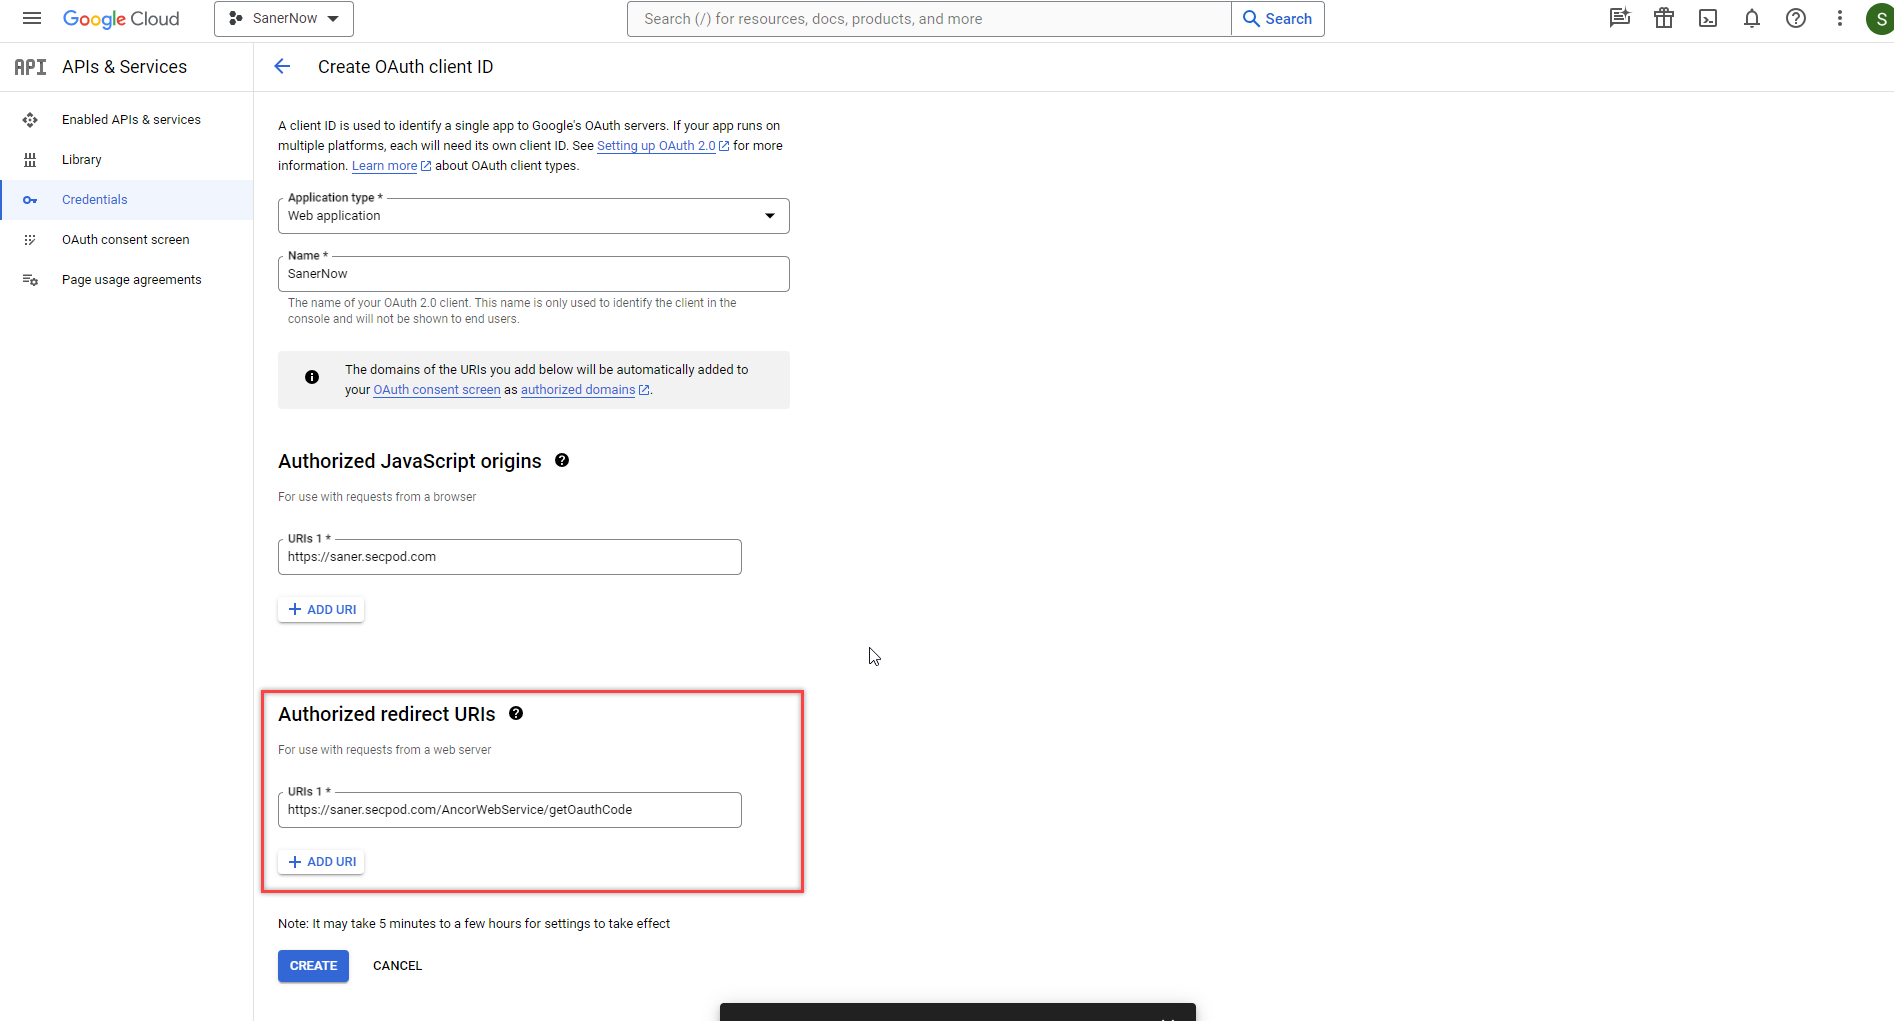
- Click the Create button. A pop-up window appears on the screen displaying the Client ID and Client secret code.
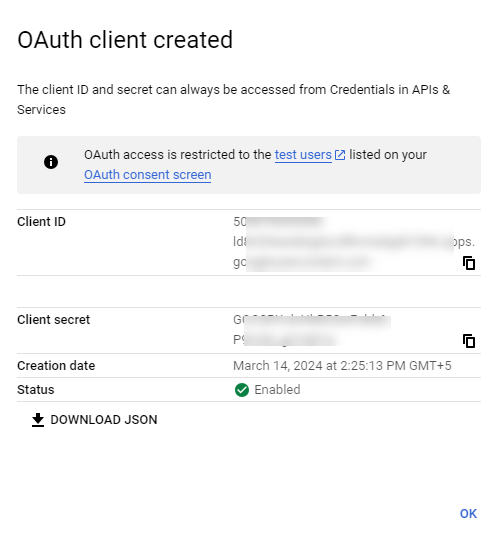
You need the Client ID and Client secret code while configuring the OAuth2 proxy in Eudoramail. Download the JSON and keep it handy.
Yahoo! Customers (Ymail, Rocketmail)
NOTE: This section is under construction. Compatibility with Yahoo! isn't yet supported.
NOTE: At this point in time, Yahoo! does not mandate that OAuth2 be used. Plain Auth (username and password) is completely acceptable, provided that you (the user) trust the application in question.
- Visit https://developer.yahoo.com/apps/create/. If necessary, sign in.
- In the Application Name text box, enter something memorable (we suggest
Eudoramail).
Step 2: Proxy Setup
All Customers
NOTE: The procedure to set up OAuth2 in Eudoramail is covered in a separate document, which is available here. All customers wishing to use OAuth2 must complete these steps after they have their access token.